One of Knowify’s many powerful tools is the ability to track real-time labor cost on each of your jobs. Using a loaded labor burden rate, all employee hours entered against jobs can show you an accurate view on how much you’re spending on labor, beyond just their pay rate. Also, with the help of Knowify’s Smartphone Application, employees can log their hours from the field by checking in and checking out of the jobsite, to give the most accurate timesheets possible.
The first step to tracking labor costs in Knowify is setting up the employees that you’ll be tracking. This will all be managed in the User’s tab of your Admin Section:
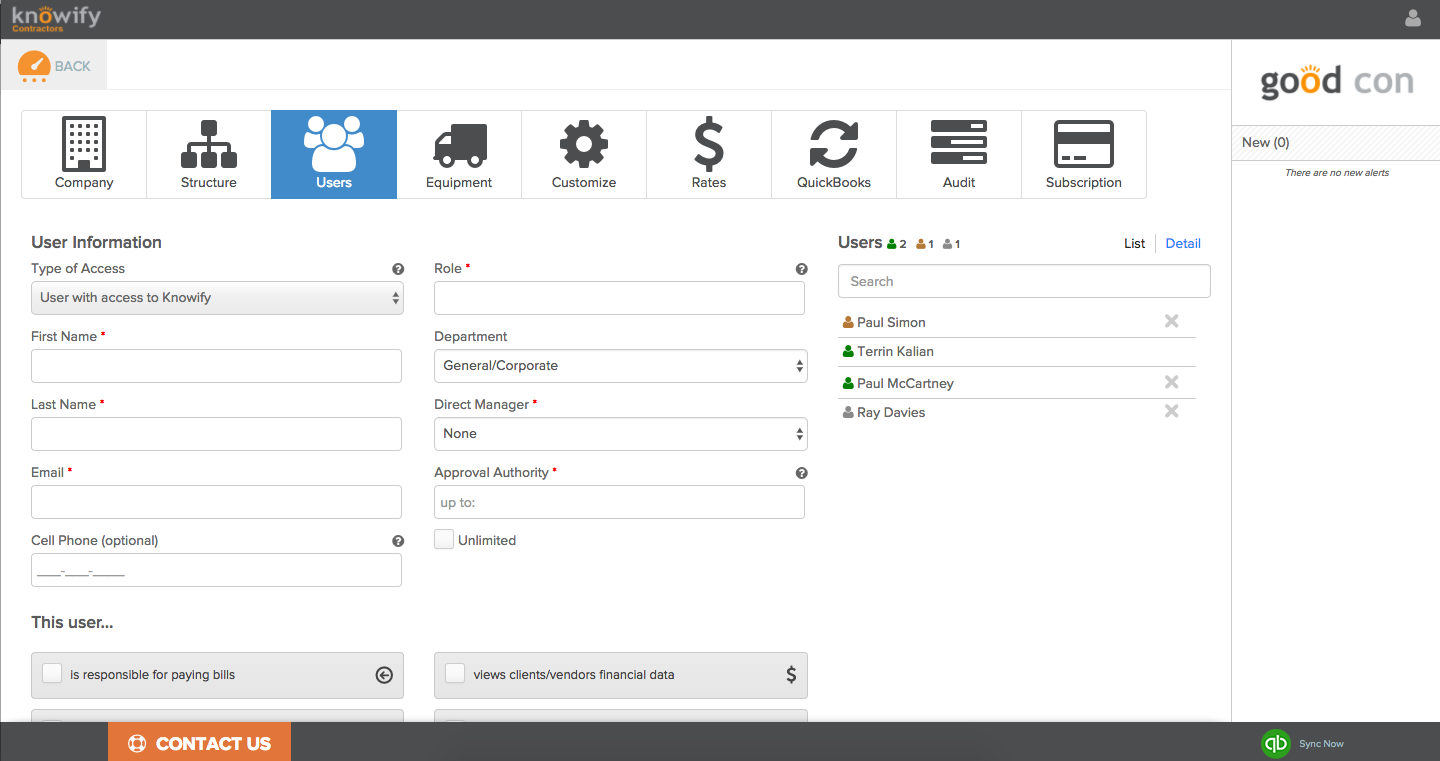
You can add three different types of user in your system:
- Users with Access to Knowify
- Users with Mobile Access to Knowify Only (this includes subcontractors or 1099 vendors)
- Users with No Access to Knowify
It is important to differentiate between the different types of users in your accounts when delegating responsibilities and privileges within your account. This chart provides some examples of access given to the different types of user accounts in Knowify:
| Users with Access | Users with Mobile Access Only | Users with NO Access |
|---|---|---|
| Create purchase orders and manage committed costs | Log Time | Can be used to enter time manually against a job with a predetermined rate |
| Manage Jobs | *Check-In/Out Other Employees | |
| Create new projects | View Job Details | |
| Adjust and Setup Scheduling | Communicate Internally | |
| Invoicing and recording payments | Upload Purchases | |
| Creating/Reconciling Bills | ||
| Manually enter & approve time | ||
| Build & Send proposals for digital e-signatures |
*Must be given Foreman Access in the users section
Any of these types of users can be tracked in your projects as labor cost, but first, you’ll need to set a loaded labor burden for each of them. This can be done in the Rates tab of your admin section: 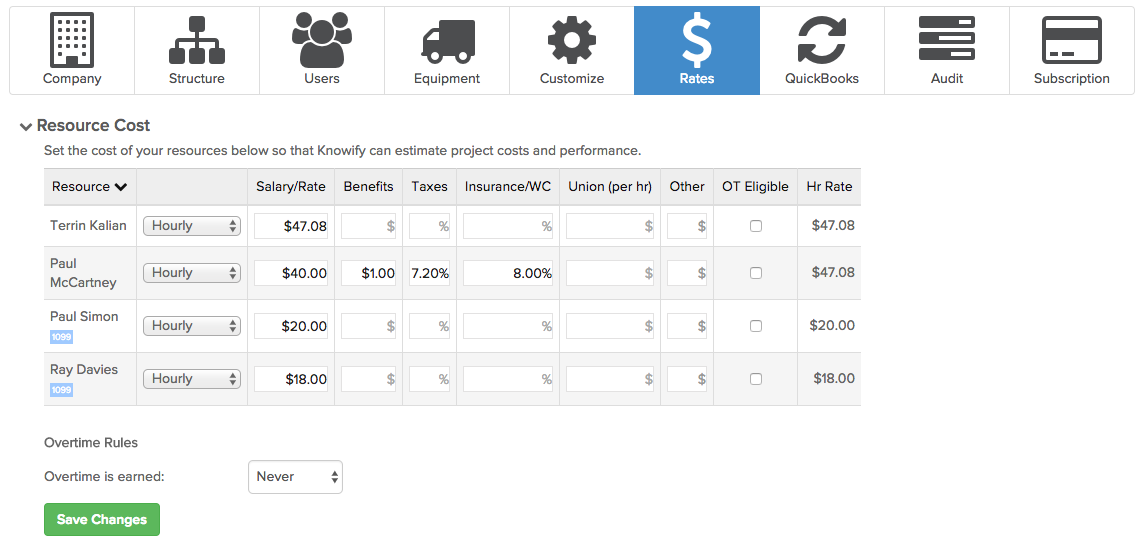
Setting this rate will control how labor is costed to your jobs as hours are added to the system. You can input the employee’s base rate, any benefits collected, labor taxes, insurance/workman’s comp percentage, an estimated union rate, and any other overhead costs you’d like to factor in. The final column, labeled “Hr Rate” will show the final value being costed to the job each hour. Yearly rates will be used to calculate an estimated hourly burden for the sake of job costs (total yearly cost divided by an estimated 2,000 business hours).
Once all of this setup is complete, you can start tracking the labor cost on jobs by entering employees’ hours. The majority of this will be handled in your Time Tracker module:
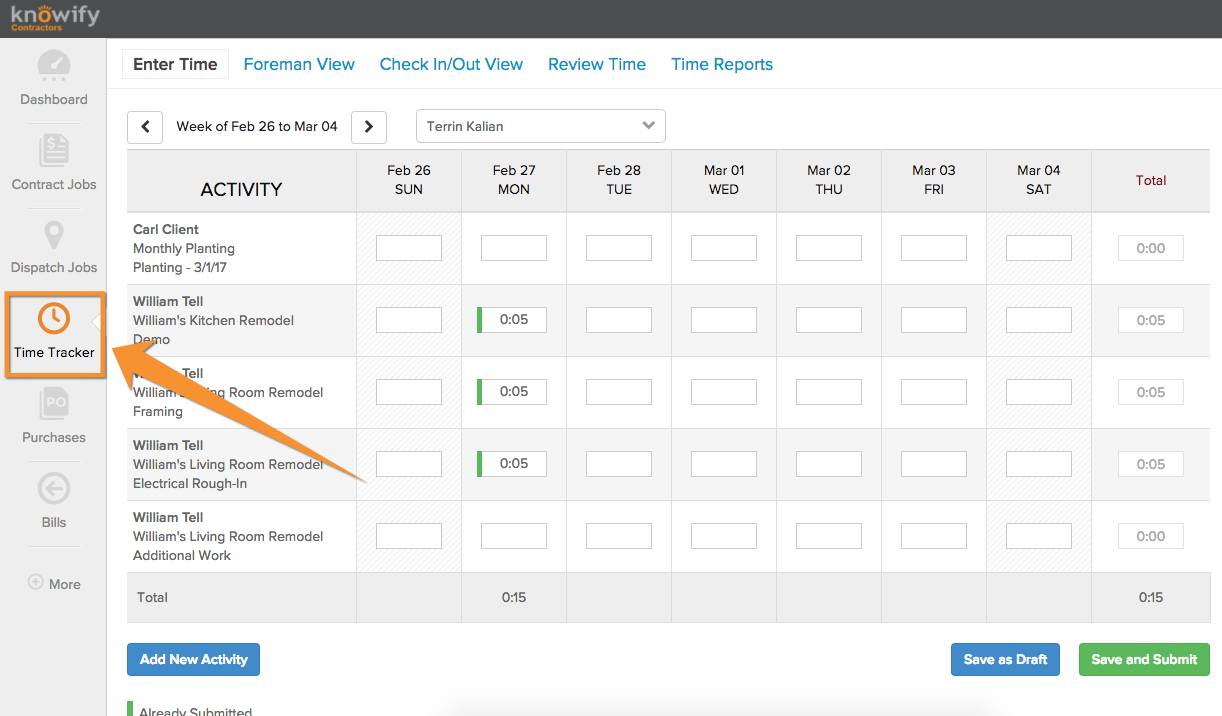
Within the time tracker module, you can enter time for your employees manually, get a breakdown of all entries submitted through the smartphone application, review the time entries that have been submitted, and produce a number of different time reports for your reference.
Enter Time
The first section of the Time Tracker is called “Enter Time”. This is where you can manually enter time on an employee-specific basis. In other words, you can choose one of your employees from the drop down menu, and we will list all of the projects/dispatch jobs that they are currently scheduled on. You can then fill in the amount of hours worked for that project under any given day of the week: 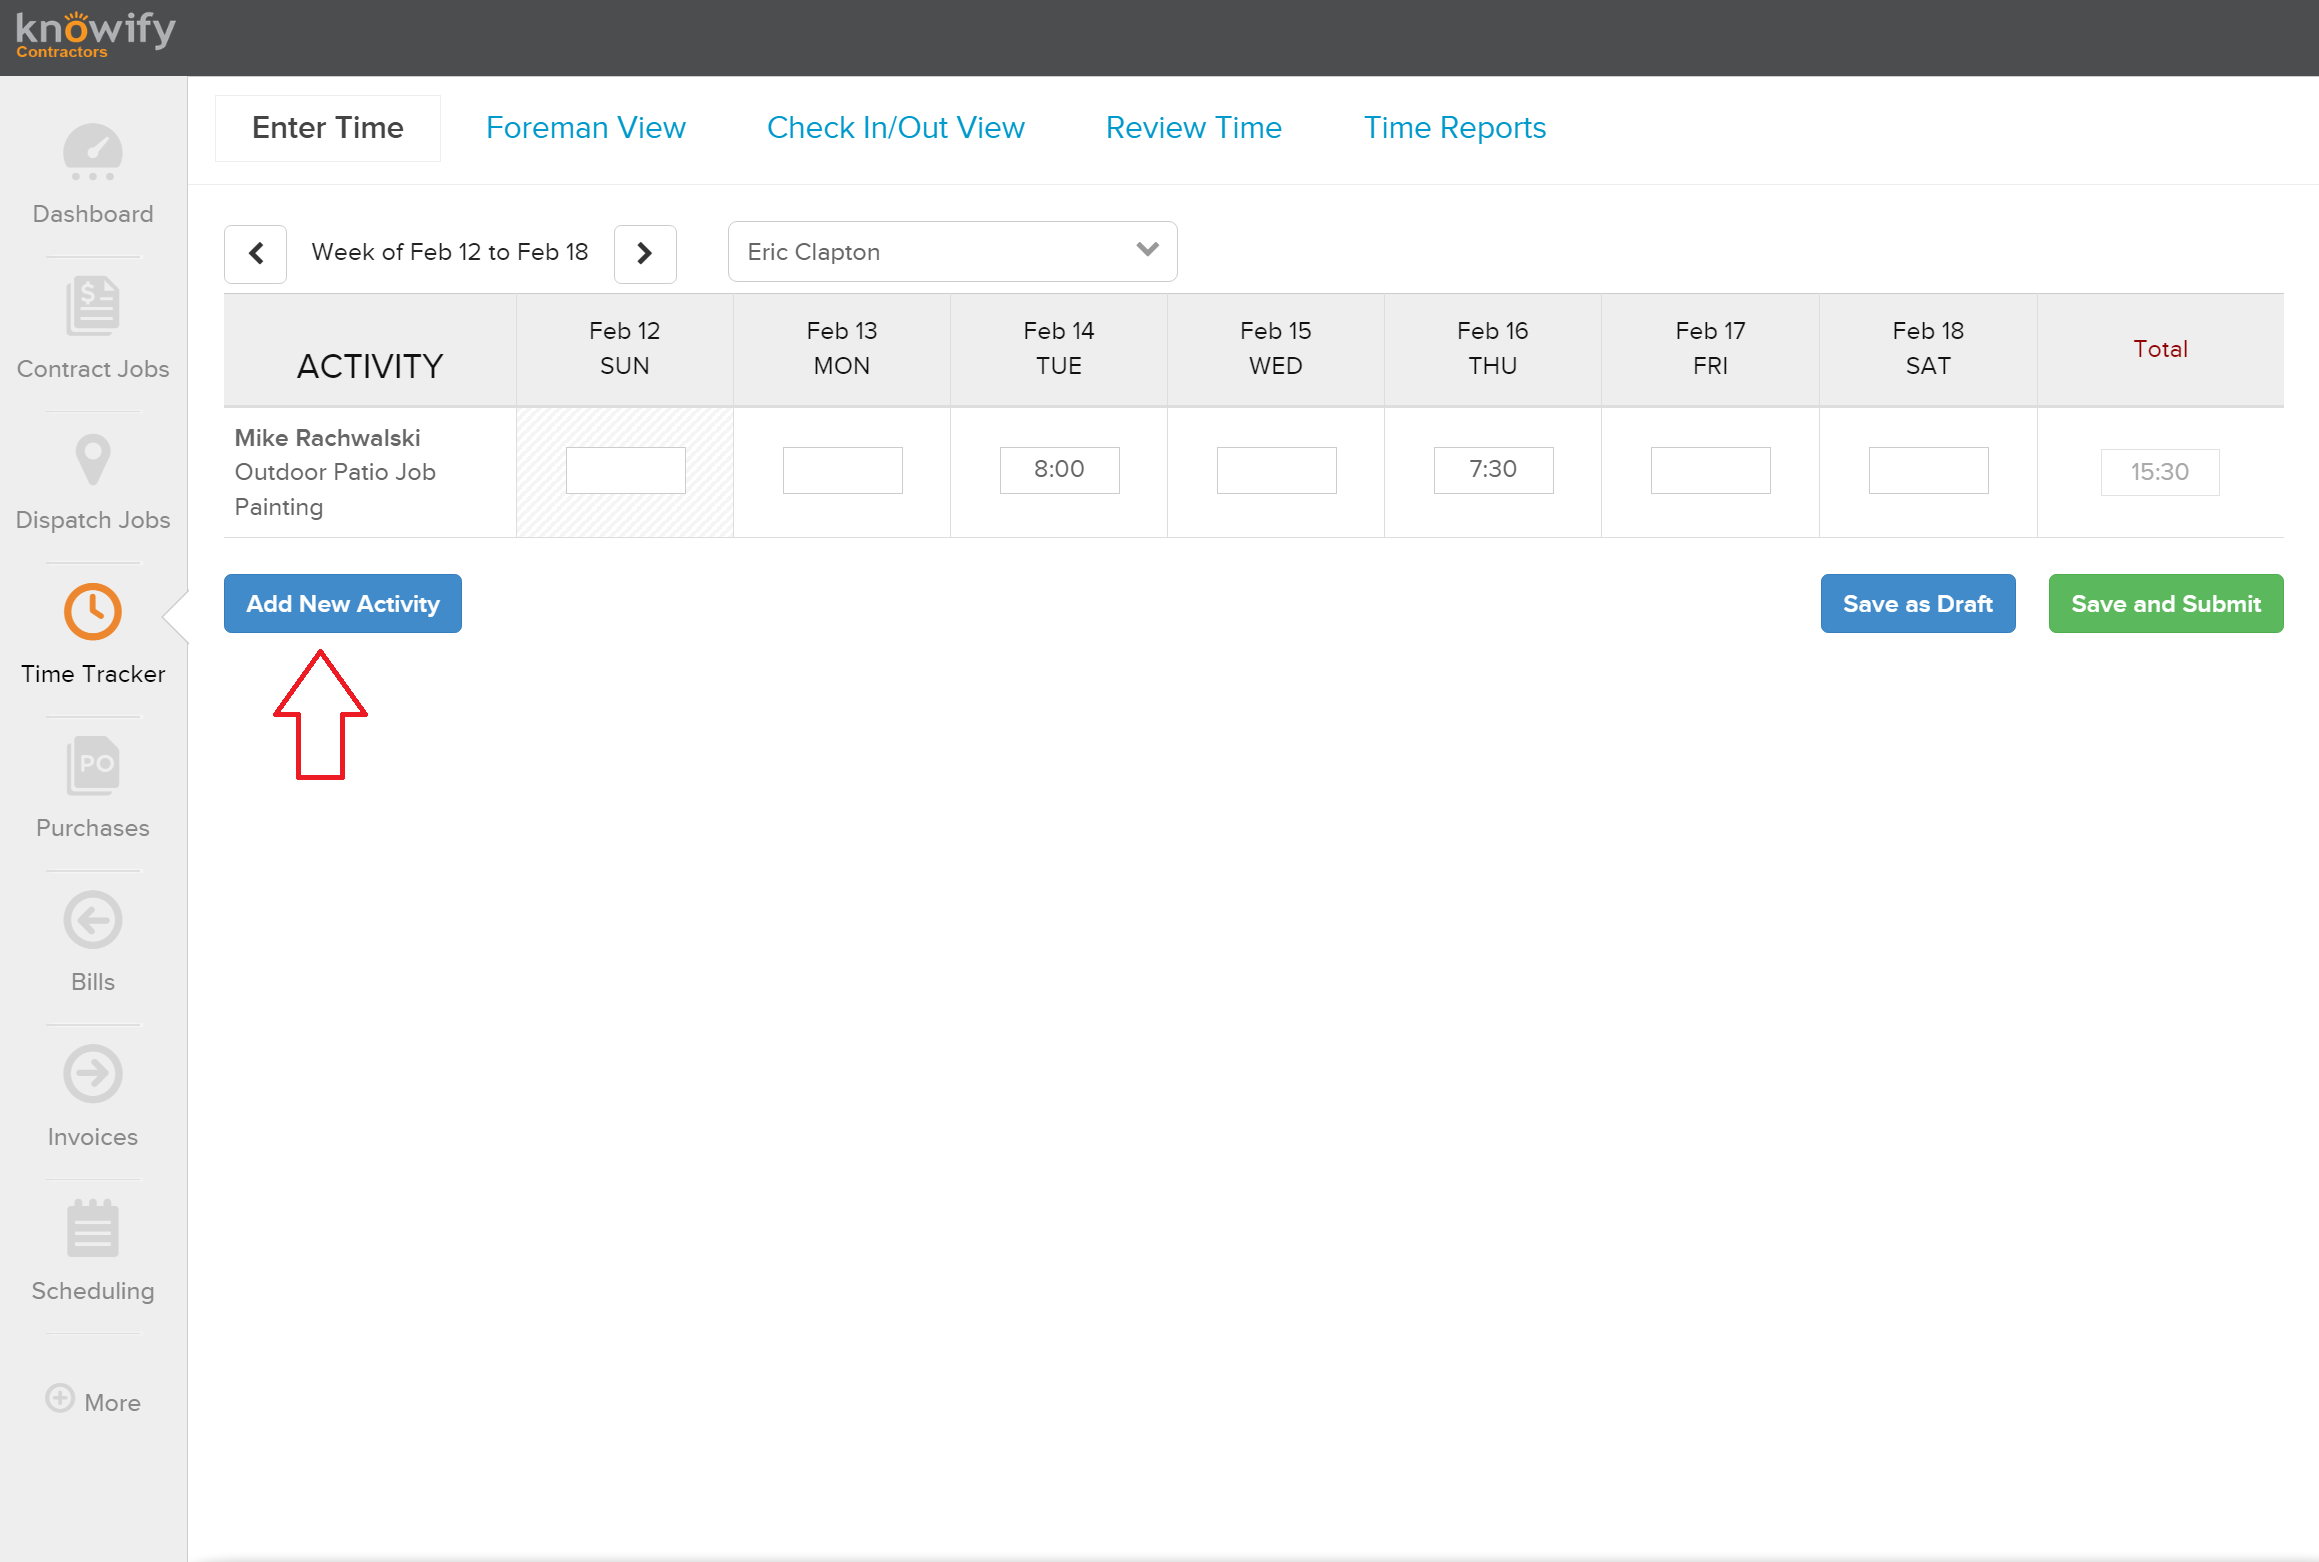 Simply click on the box to enter time for the date that corresponds to any job listed under the employee’s name. If your employee is not scheduled on a job, you can click “Add New Activity” to manually assign an employee to any of your jobs.
Foreman View
The “Foreman View” is a way for us to also enter time manually, but instead of searching by employee, this is a way for us to search by job.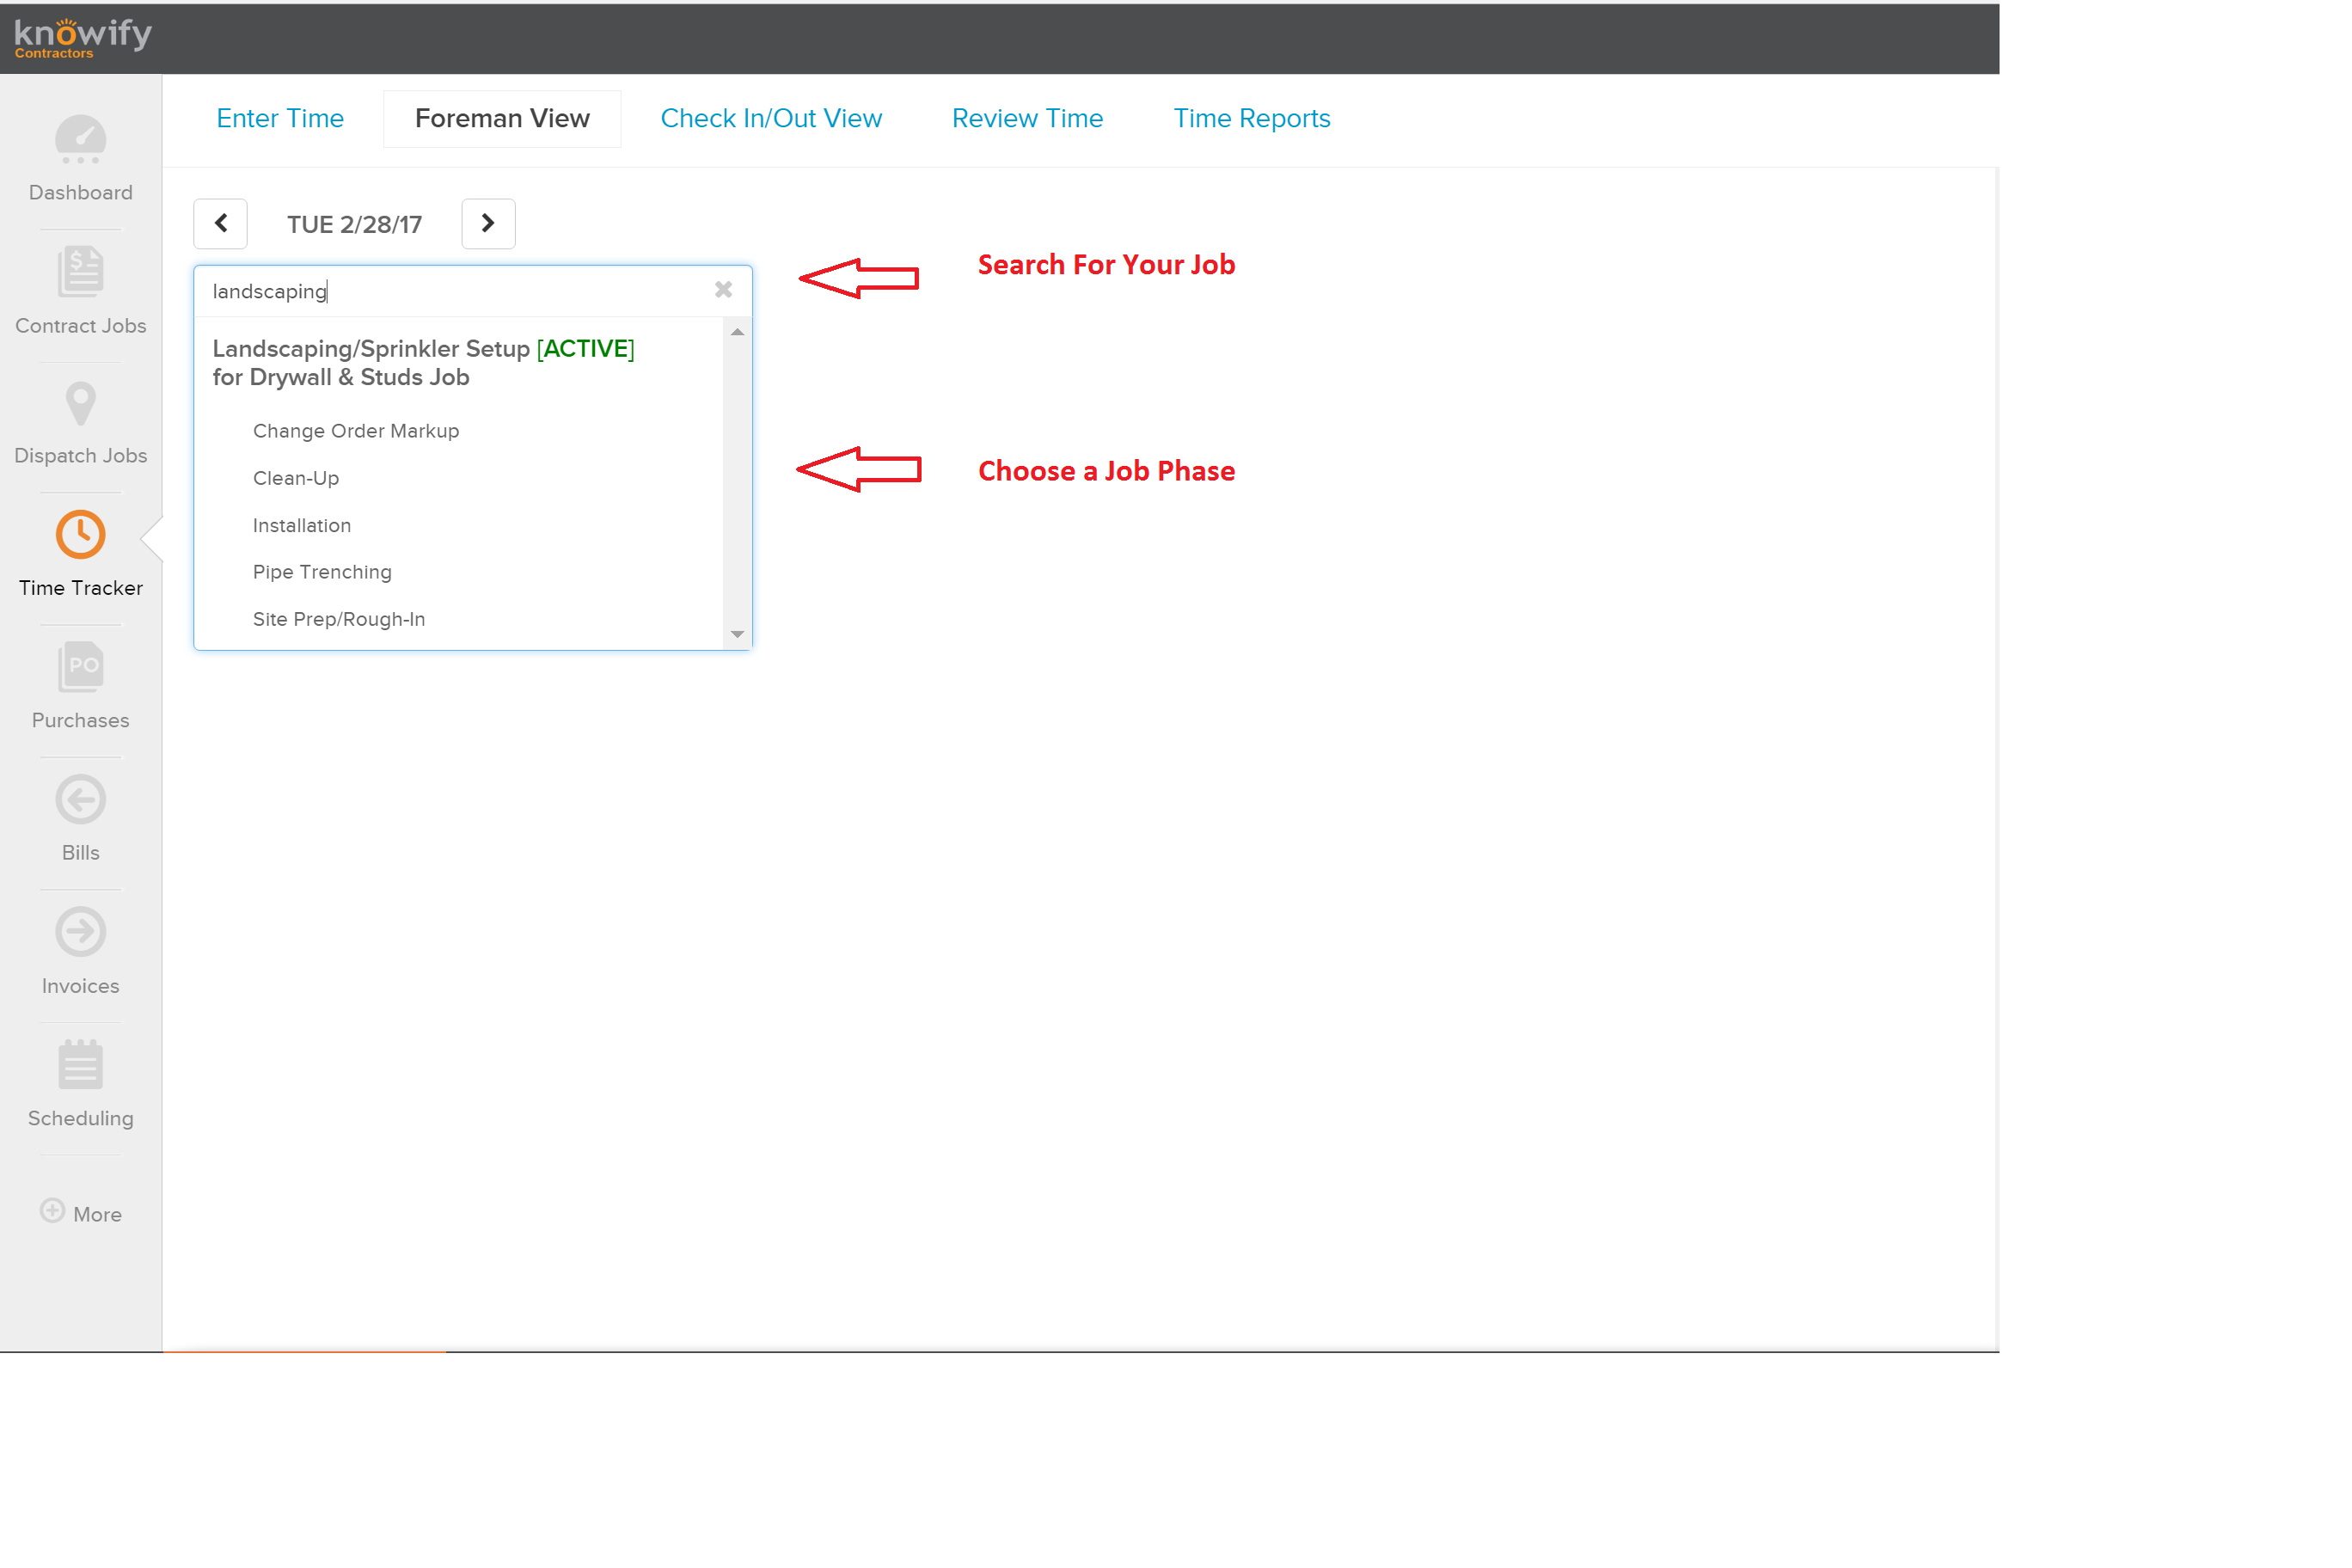 Click on Foreman View, then search for your job (if necessary, you can select a different date). Once you have your job, you can select the corresponding job phase that you want to enter time towards. Once you select the job phase, you will see a list of all the employees from your users section, as well as an indication as to who is scheduled on the job for that day.
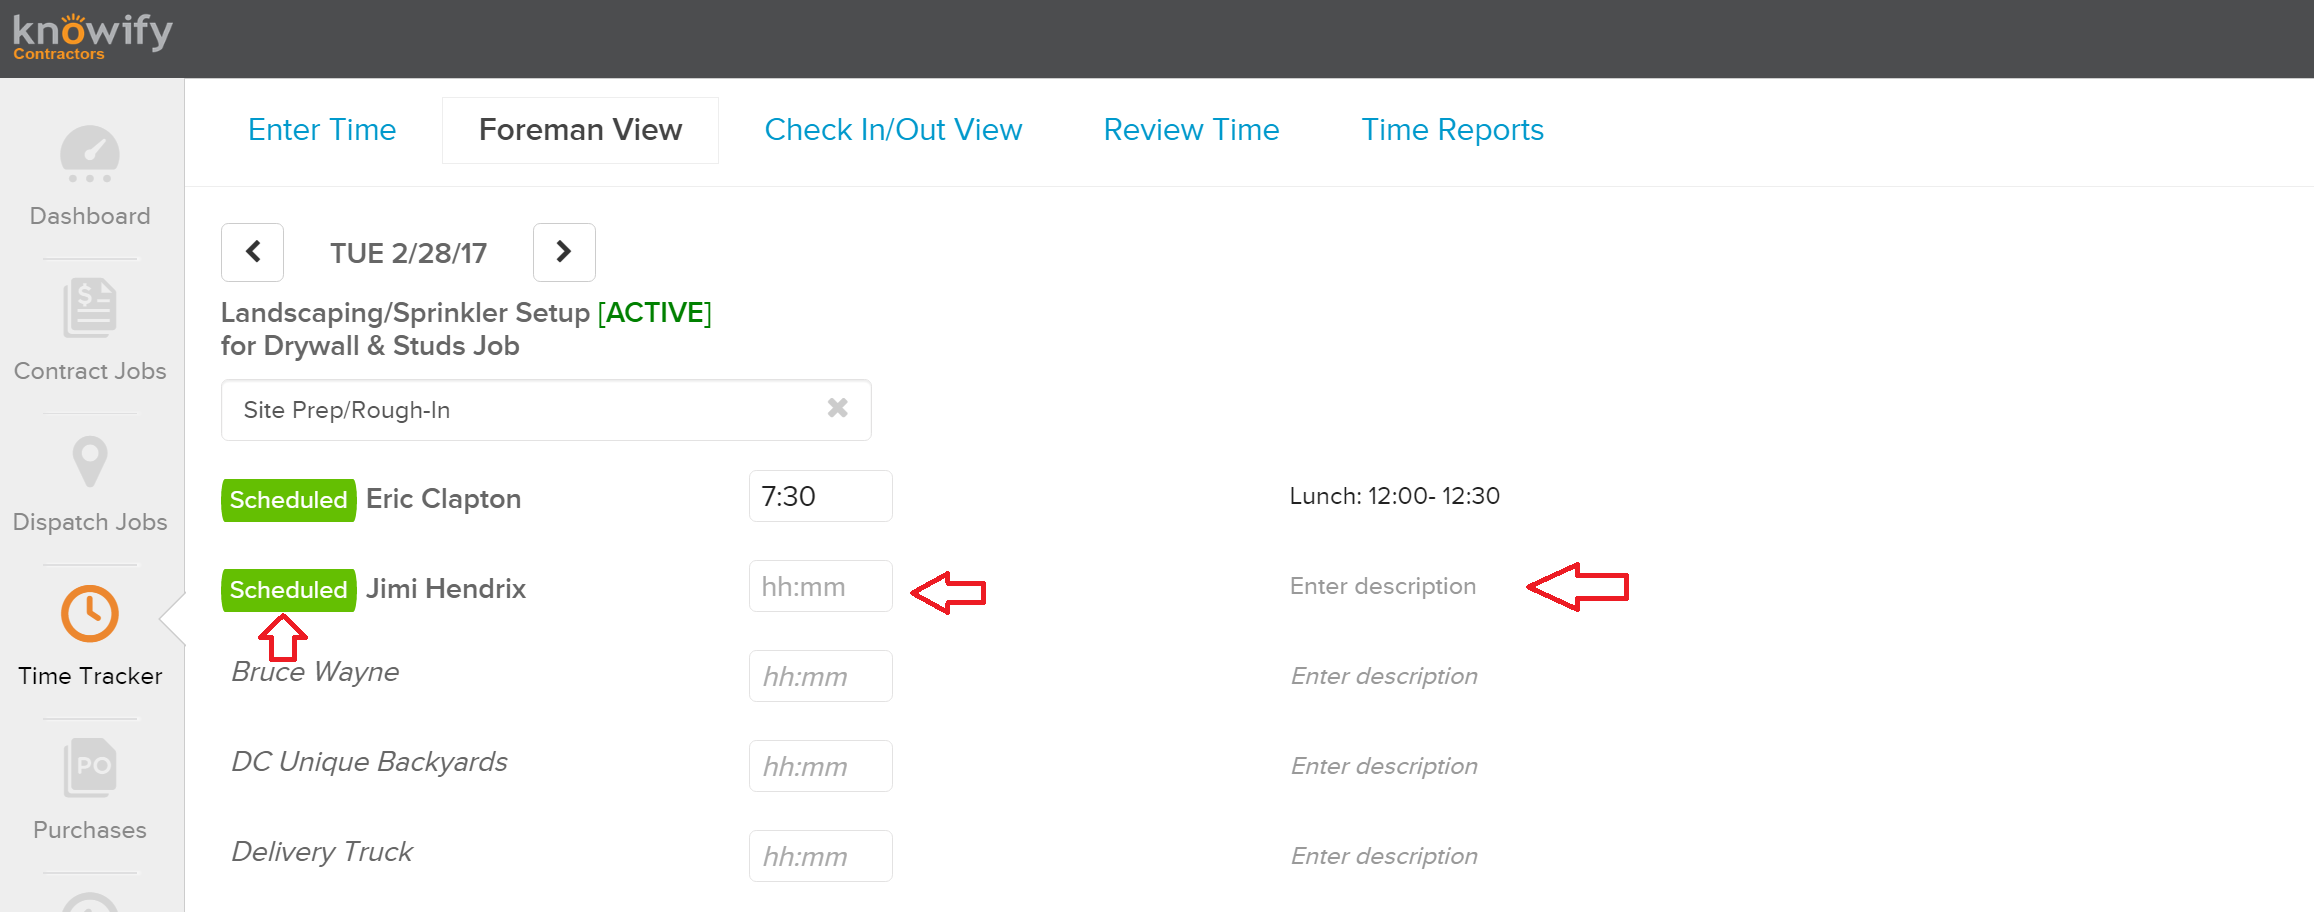 In the foreman view, you will see who is scheduled to work, you can enter the amount of time each employee worked (whether they are scheduled or not), and also add in any relevant description/comments for each time entry.
Check In/Out View
The next section is the “Check In/Out View”, where you can see all the check in/out entries submitted through the mobile app, as well as add a manual check in/out. When you select the date range, we will display all check ins and outs for that period of time as well as some additional information for you: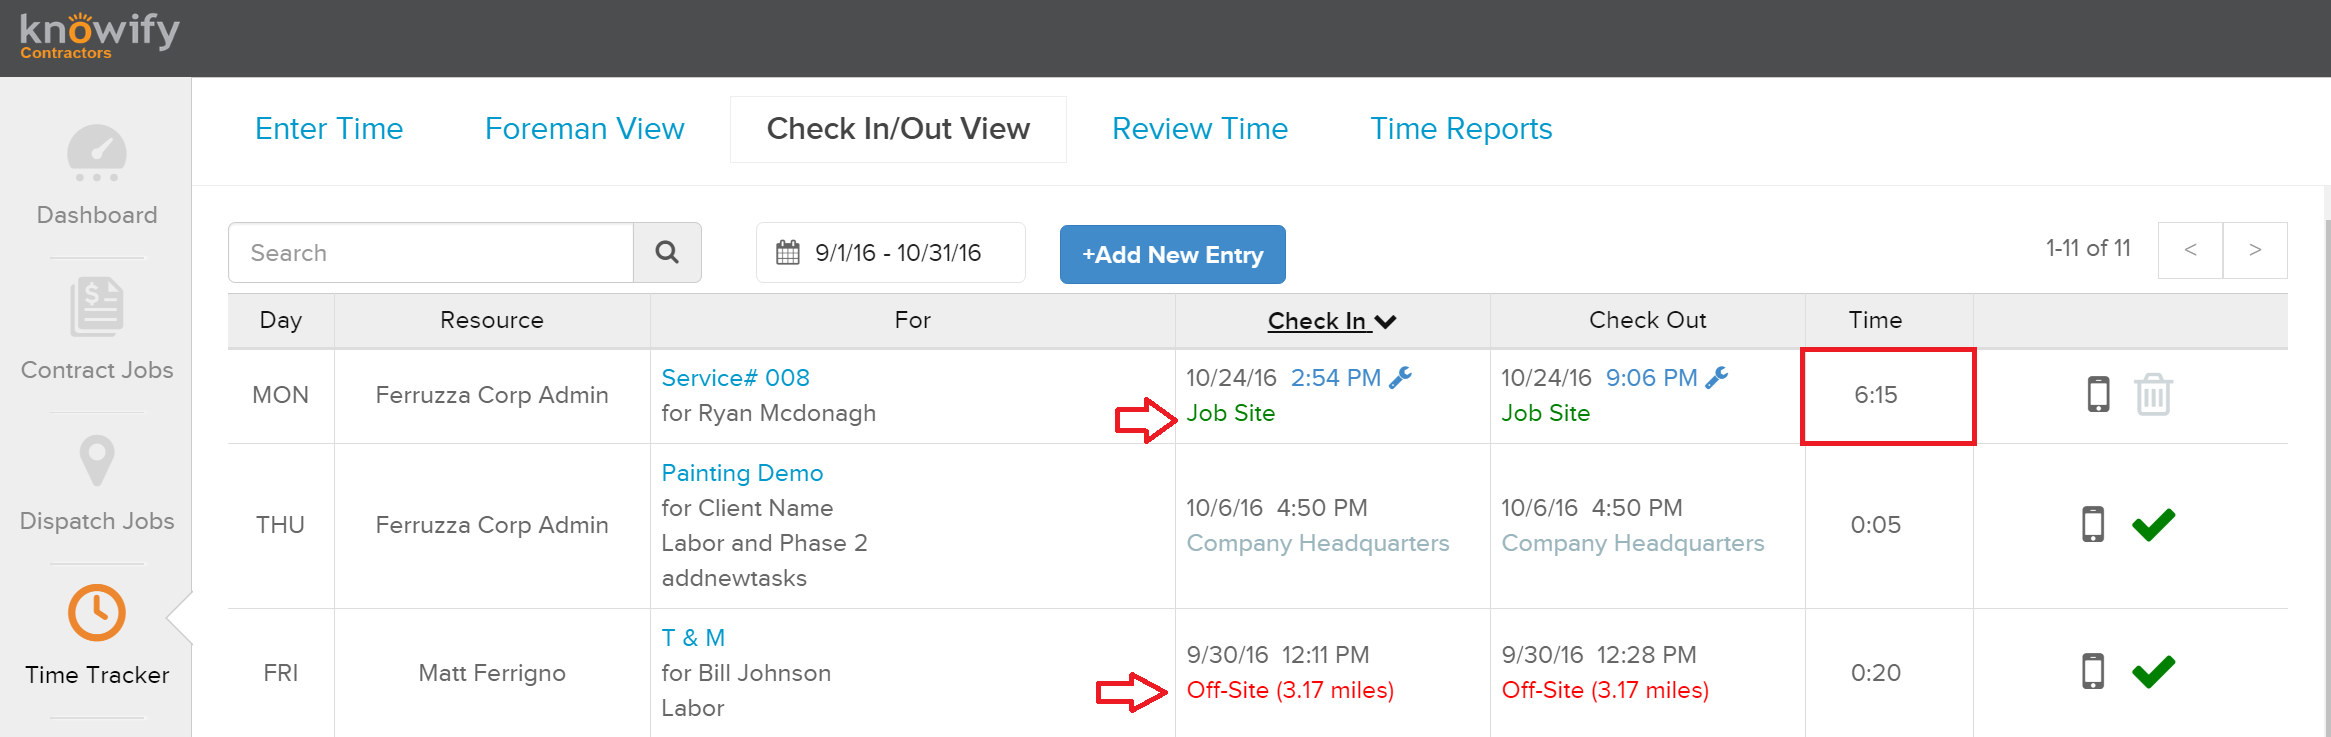 You can see in the screenshot above, we display the day, employee name, job and job phase they checked in for, a timestamp of when they checked in and out, and the total time spent on the job between checking in and out. We also display, with respect to the job site address, whether the employee was on site or how far off site they were when they submitted this entry. To the far right, we will also show if the time was approved yet (foreshadowing…) as well as what type of phone/tablet was used.
You also can always add a manual check in as well by clicking “Add New Entry”, located next to the date range. Once you click here, you can choose your employee, the job you want the check them into, as well as the date and start time. You also have the option of setting the time out to complete the time entry, however if that is left blank, you can come back into this check in/out view later and check them out with one click. Also, if you manually check in an employee and don’t set the time out, they will be able to check in from their mobile application: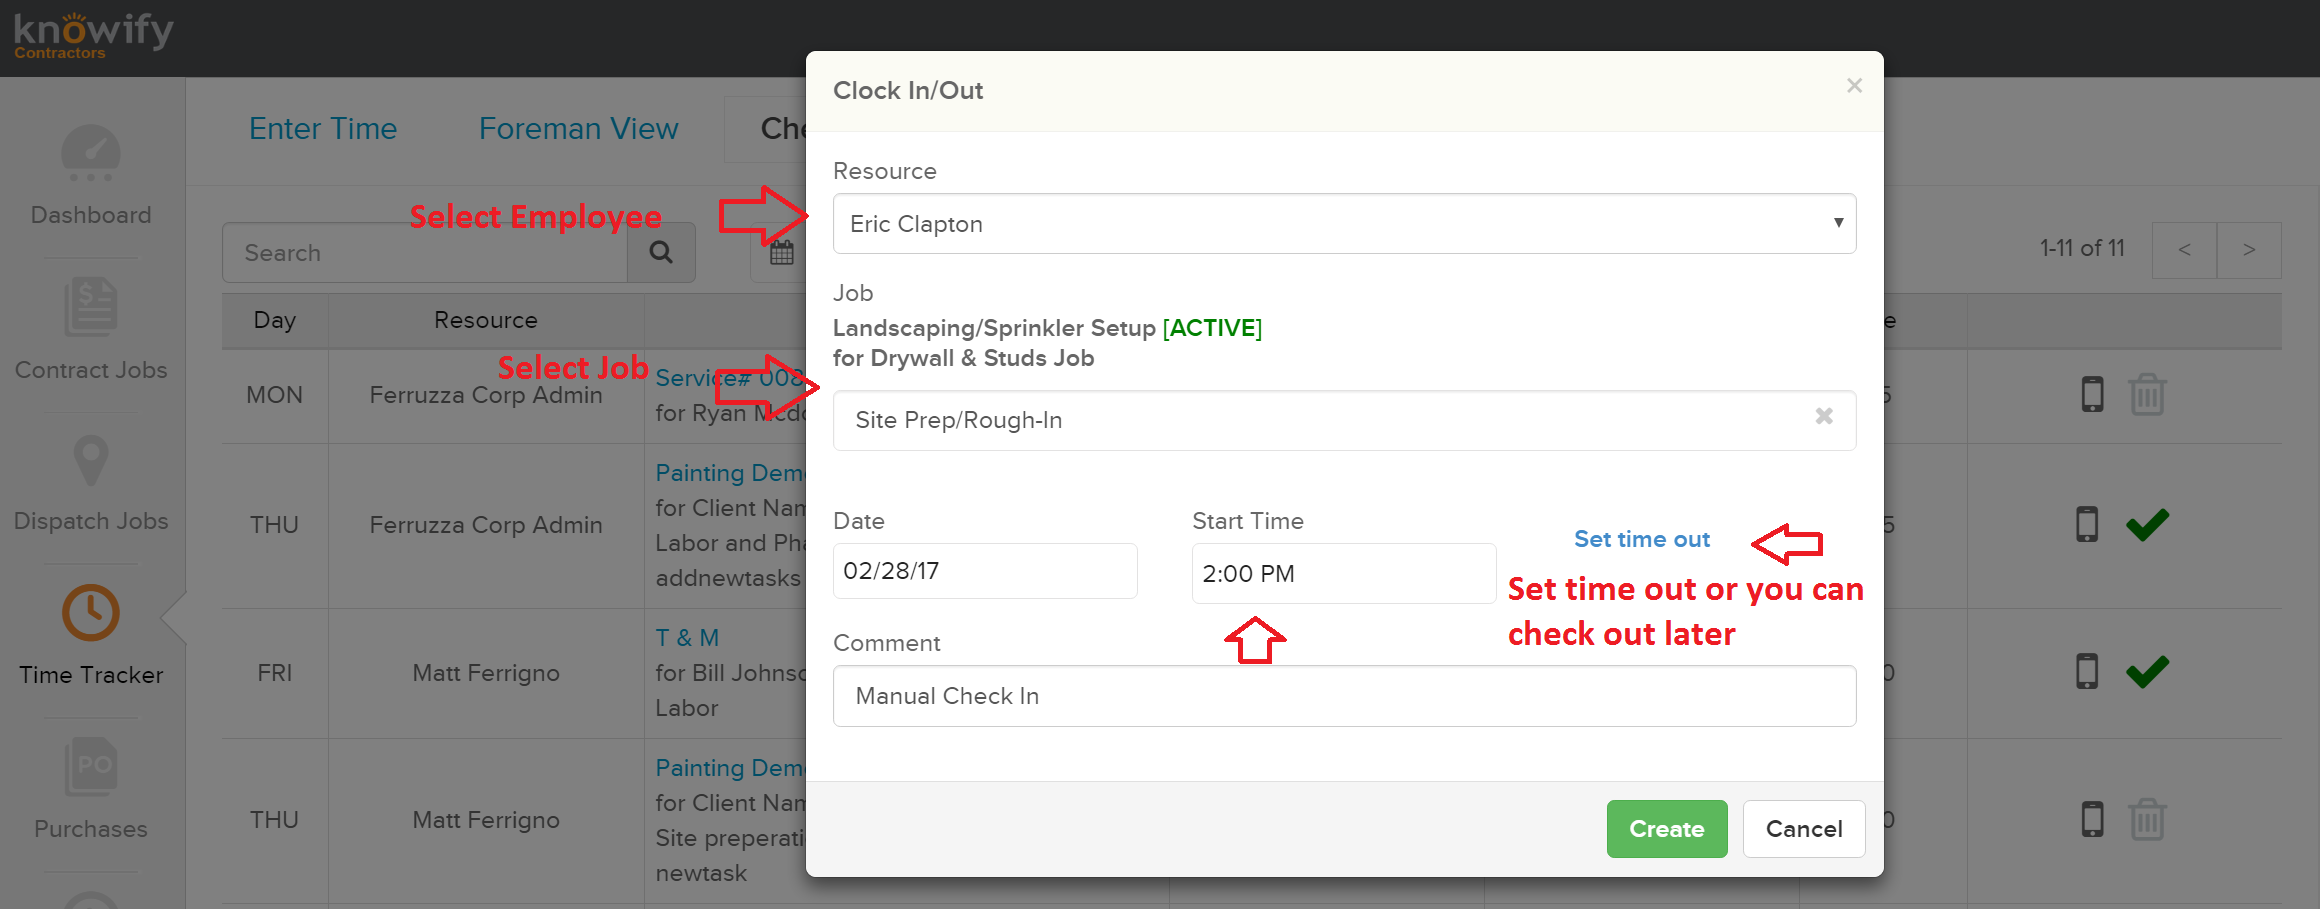
Review Time
The last section of the Time Tracker module is “Review Time”. Here you will be able to see all of the entries submitted over a given time frame and have the option to approve, reject, or adjust each entry.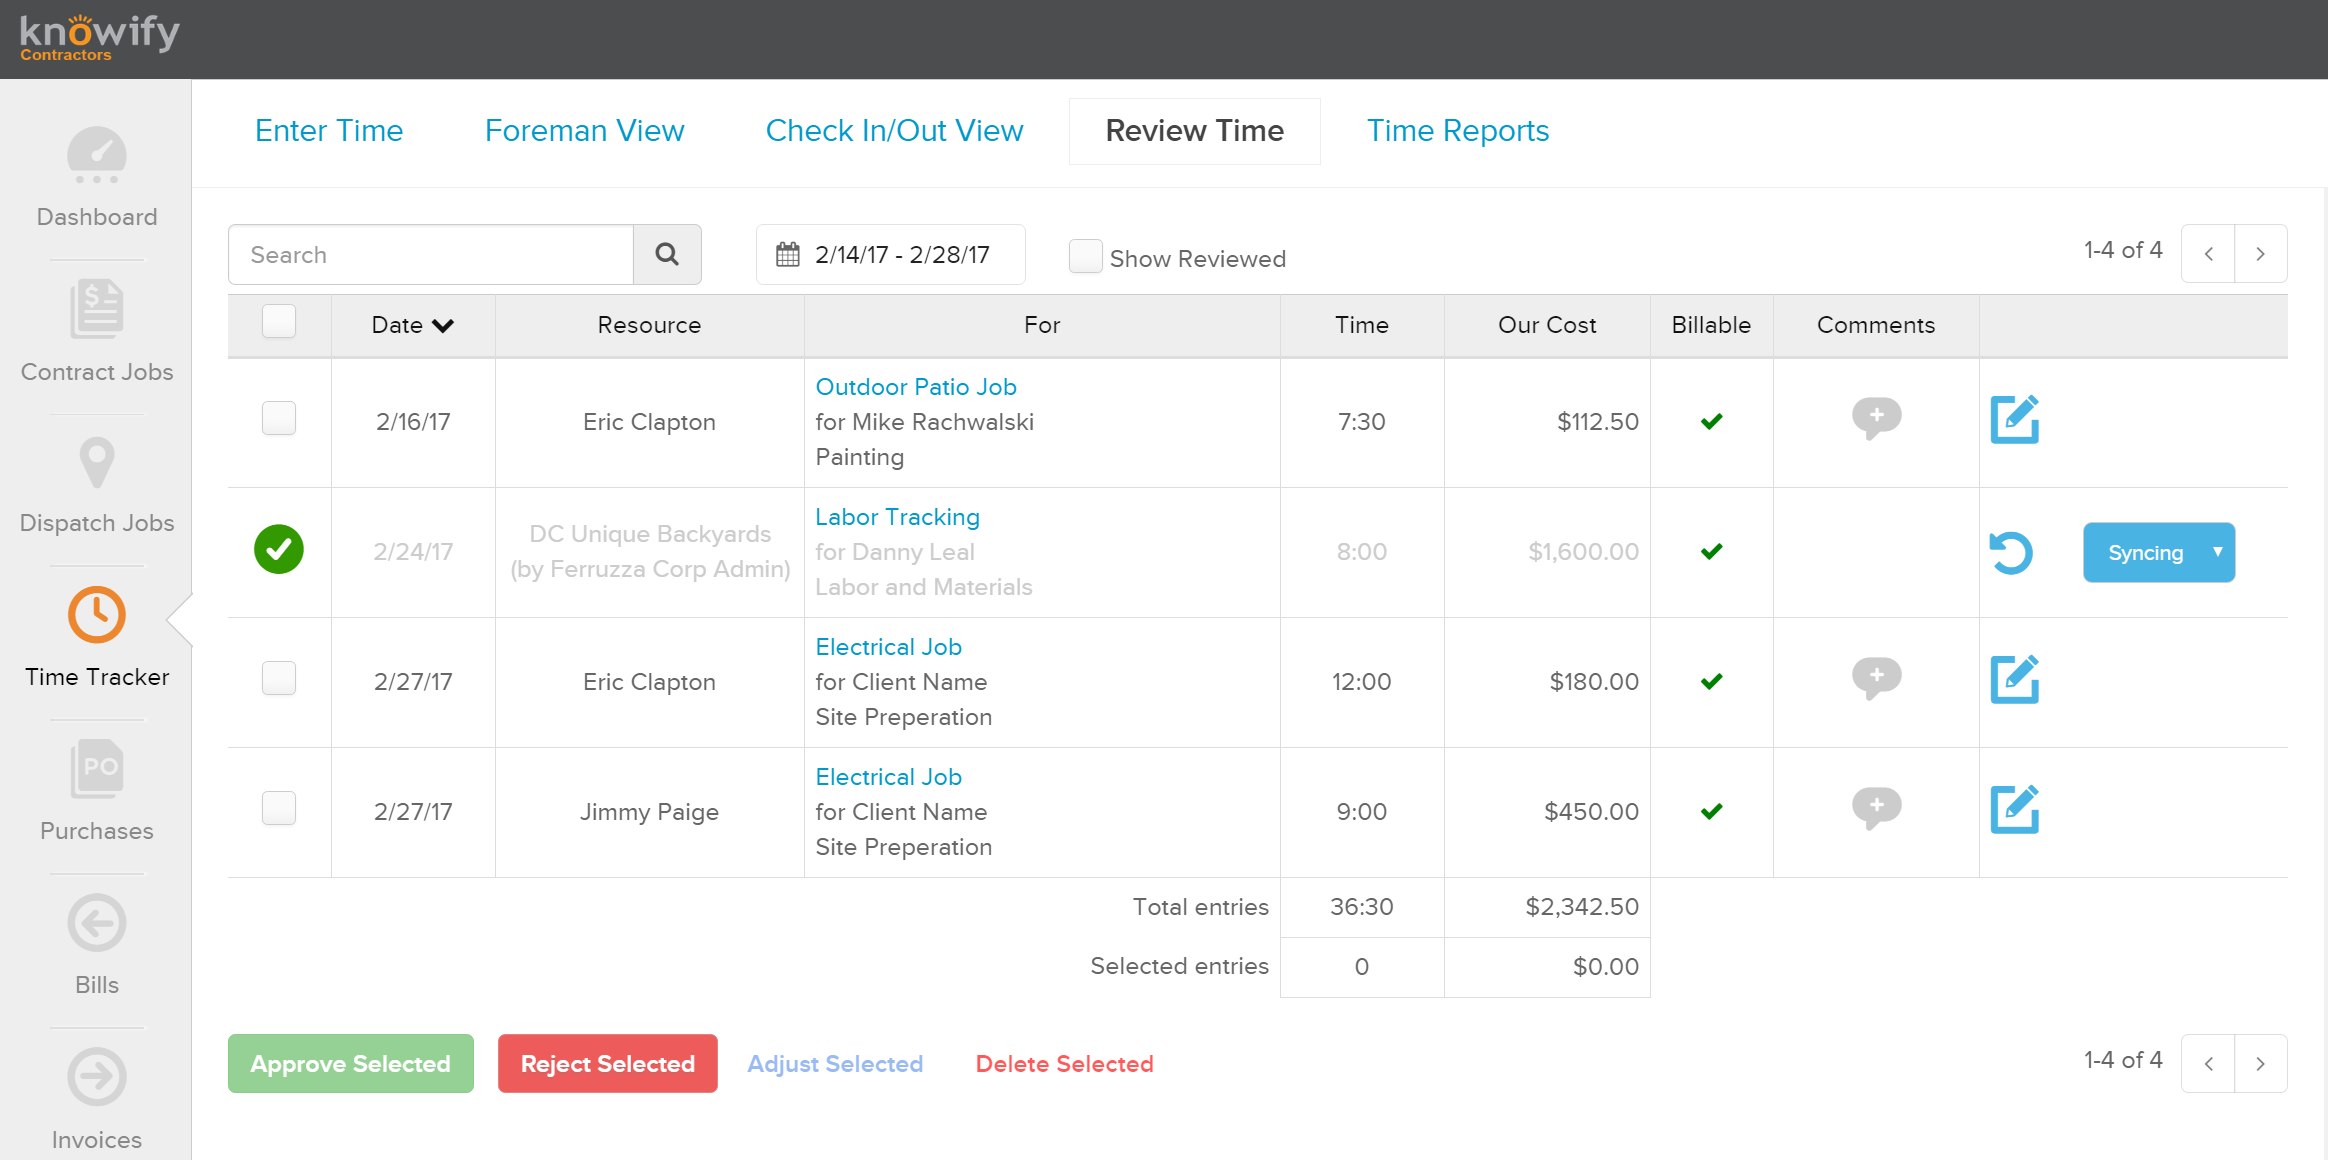
In the review time section, you get the date of each entry, the employee name, job and phase worked on, and total elapsed time spent for each time entry. You can select time entries by checking the box to the left (select all is an option) and perform various actions by choosing to approve, reject, adjust (see below screenshot), or delete at the bottom of the page. *You will also notice one of my entries in the screenshot above shows “Syncing” to the far right of the page. This relates to our sync with Quickbooks Weekly Timesheet, where for any employee setup and linked in both Knowify and Quickbooks, we will sync over to Quickbooks the hours you approve in this section of Knowify. It is important to note, the cost you use in Knowify is purely for job costing purposes and DOES NOT sync to Quickbooks. We only sync the hours to your “Weekly Timesheets” section of Quickbooks.
When you choose to adjust any of the time entries selected, you have a few options on how to do move forward. First, you can select “Set Time” and just enter the adjusted time entry here (hh:mm format). However if you select the “Add/Subtract” option, you can either add or remove time from the existing entry. In the example below, I can subtract 30 minutes off of the existing entry to account for a lunch break by entering the information as follows: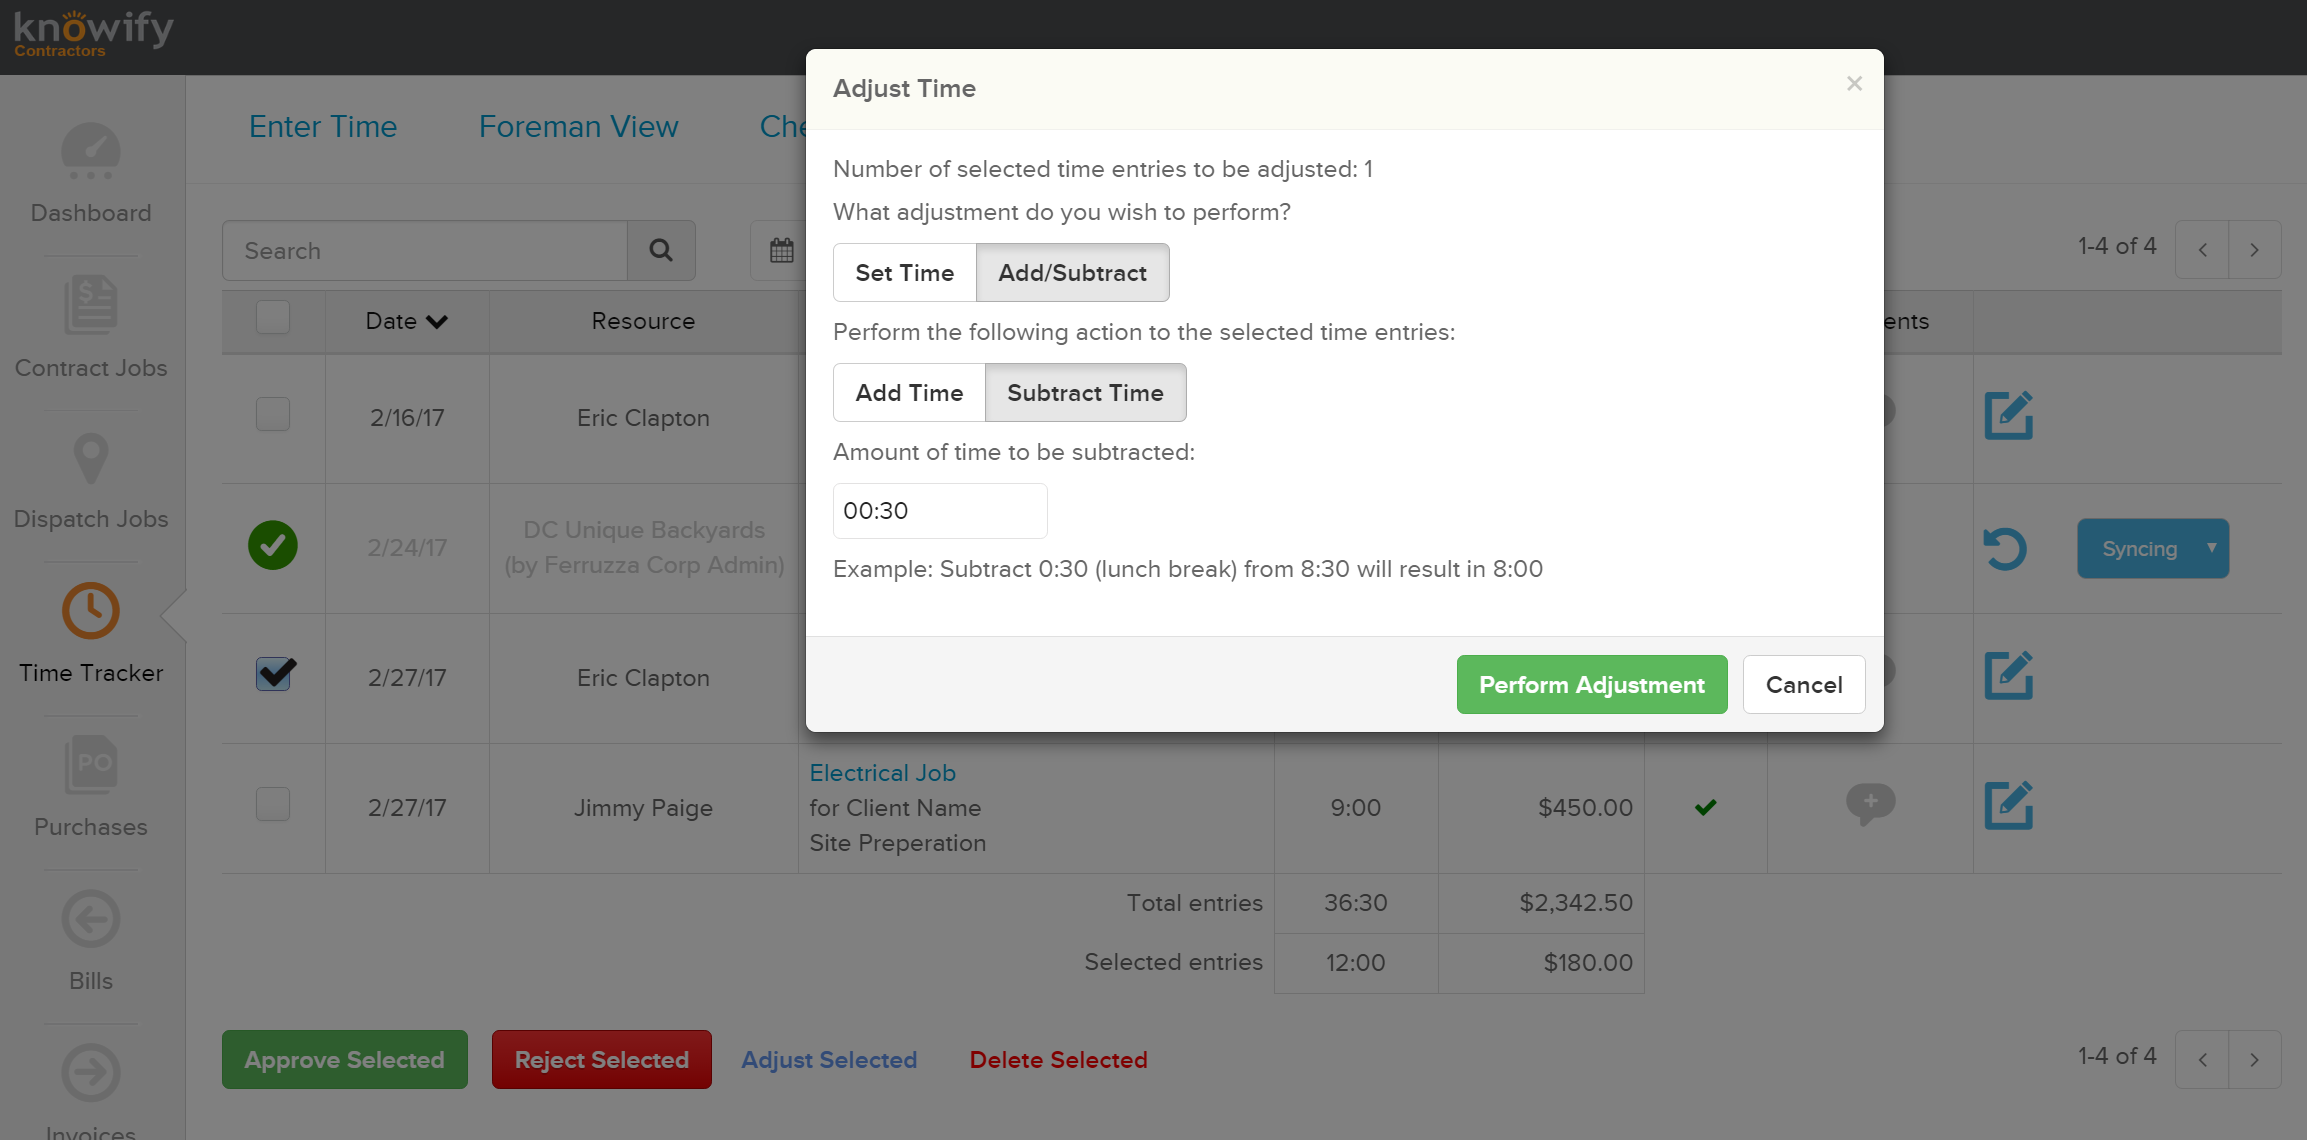
Time Reports
Knowify can also generate a number of Time Reports with these entries in the “Reports” section of Knowify. You will get an exported PDF or XLSX document downloaded for whichever report you choose. Each report presents a different piece of information:
- Time Report (PDF)– Sorts by client/department and by employee:
- Time Rate Report (PDF)– Sorted by list of jobs: shows date, employee name, services provided (job phase, comments, check in/out), and the amount of time
- Time Card Report (XLSX) – Gives you a breakdown of all check in/out entries for a given time frame
- Timesheet Report (XLSX) – AKA Service Report: list each day as a separate column within the date range specified and marks the amount of hours each employee worked for each particular day
- Foreman Report (XLSX) – lists each employee, their total hours worked in the range, and total $ of reimbursements in the date range specified
- Payroll Report (XLSX) – Breakdown of total hours worked for a given time frame, overtime hours accrued, total gross amount owed, as well additional fields for you to manually put in additional information (for example: vacation time).
To learn more about labor costing and entering time in Knowify, you can check out the tutorial video on time tracking by clicking here.