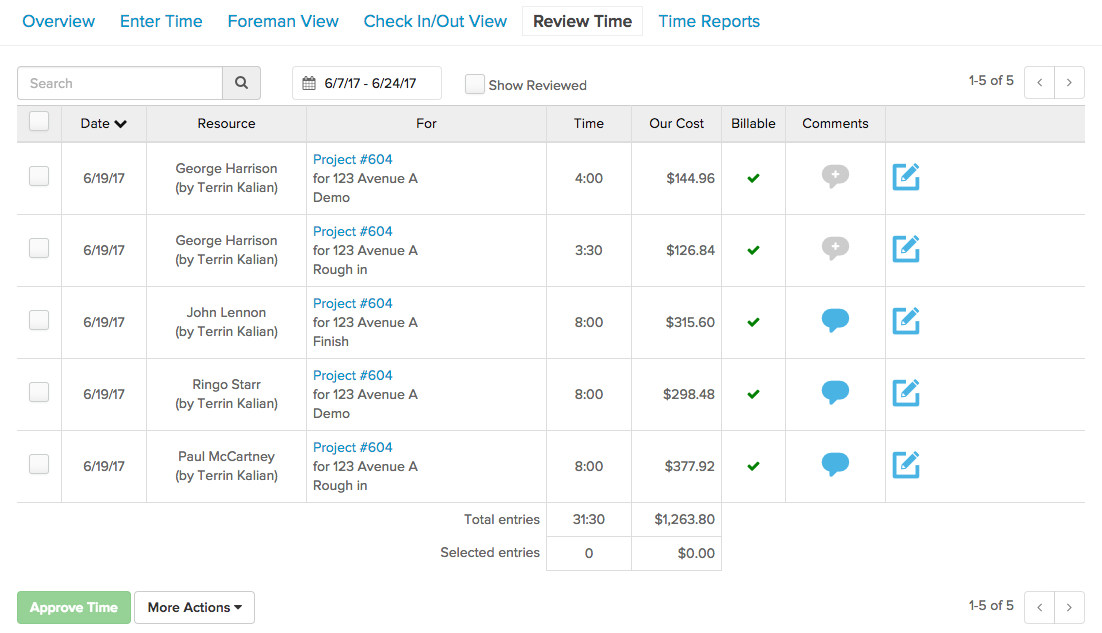
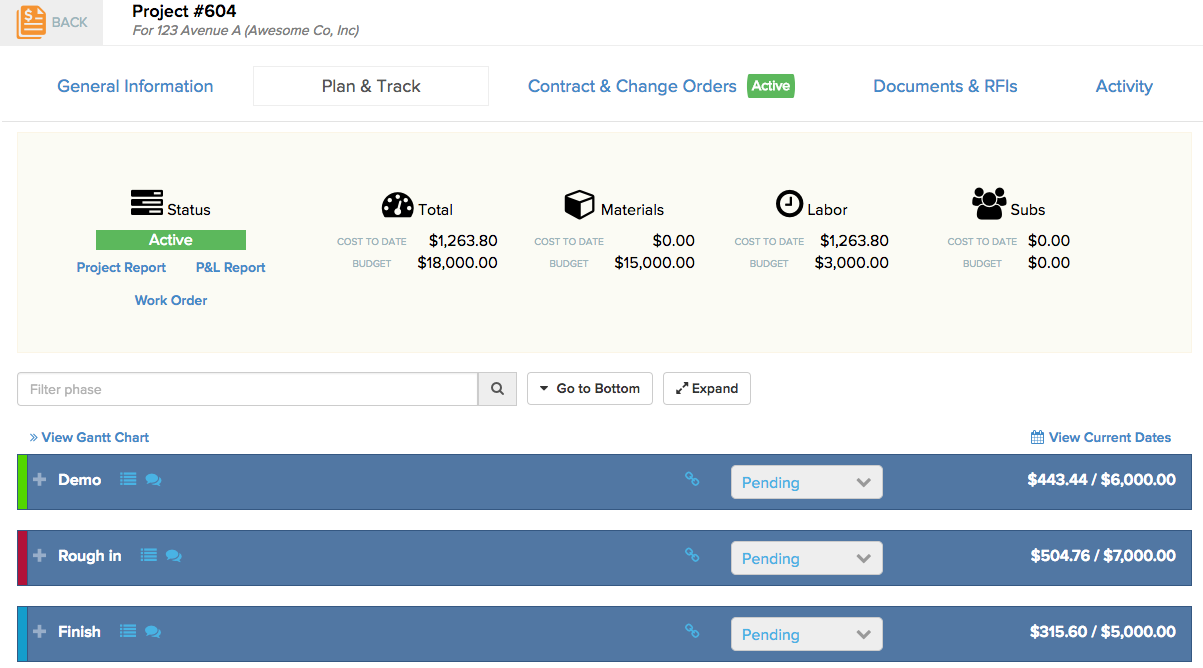
If your company uses ClockShark for their time tracking, Knowify has an import feature to make job costing the hours as seamless as possible. To get this setup correctly, you will first want to make either some Service Templates or Plan & Track templates, to ensure you can keep a naming convention on your phases. This is not necessary, but can make the job costing process much faster and more automated. See the project plan below for an example of a project plan in Knowify:
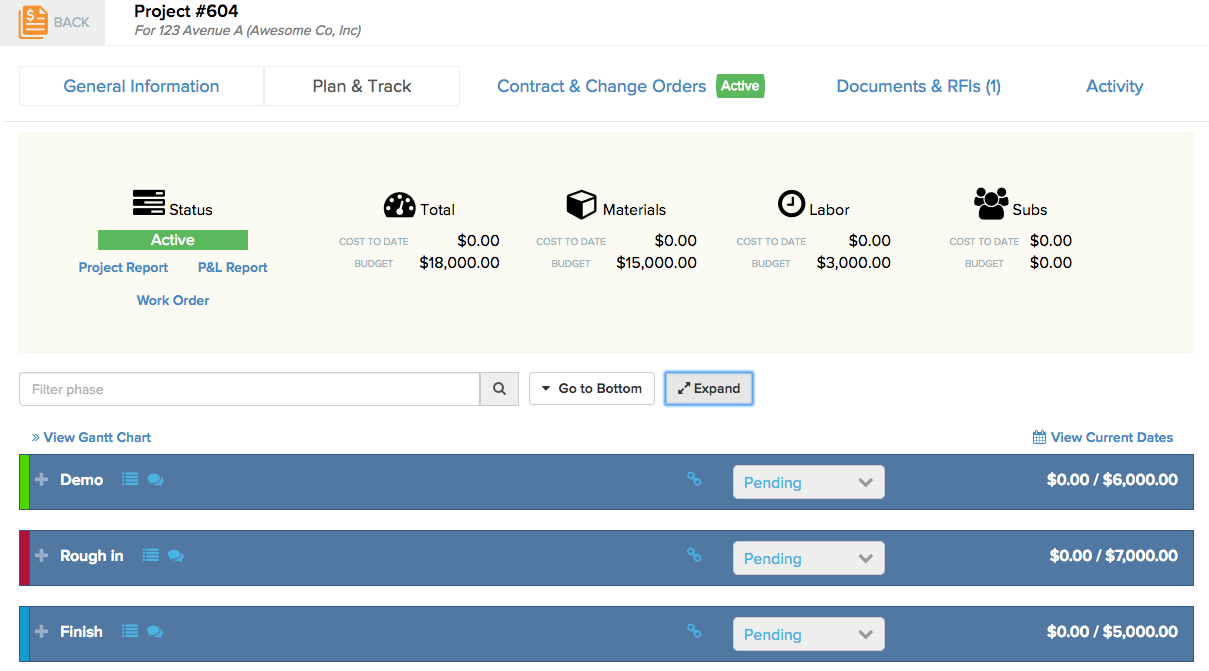
You can see that the phases are named Demo, Rough in, and Finish. In order to auto-cost time entries from ClockShark, you’ll want to make sure that your ClockShark tasks have corresponding names:
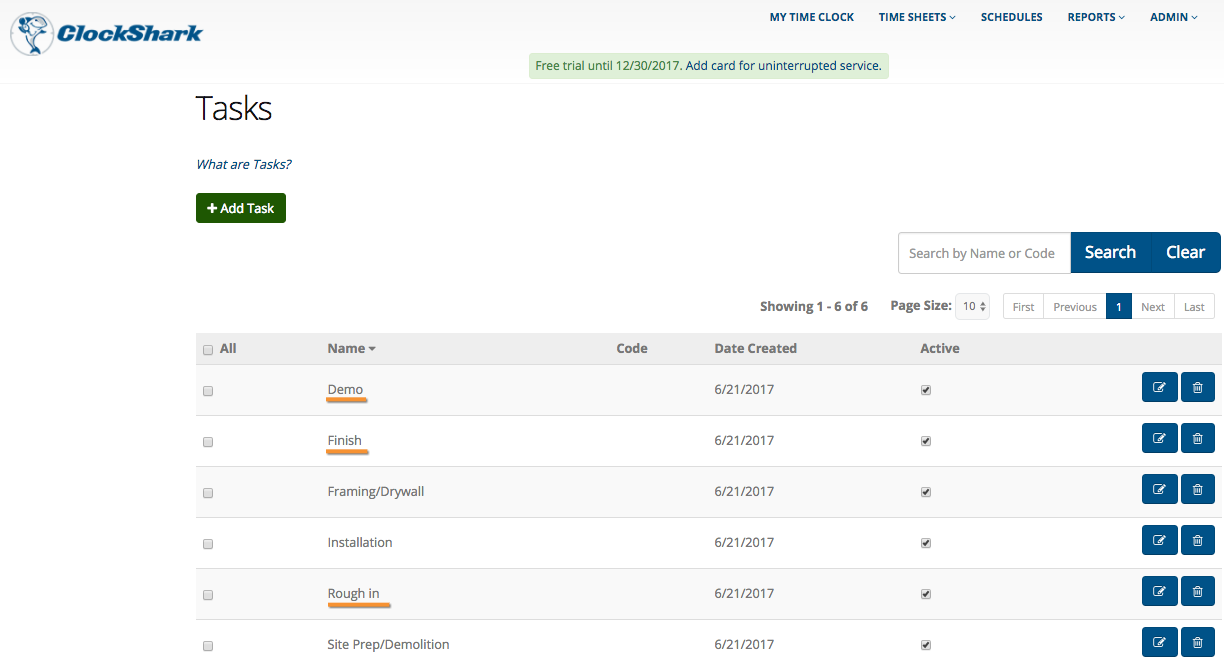
**It is important to make sure the names line up perfectly in spelling and format (spacing and case) to make the import automatic. It is highly suggested that you copy and paste the names from one system to the other.
Next, you will want to also ensure that the job name in Knowify matches up with that in ClockShark as well:
Knowify: 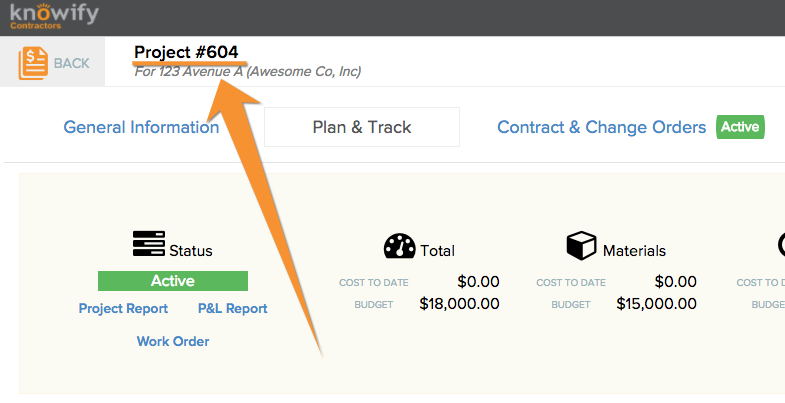 ClockShark:
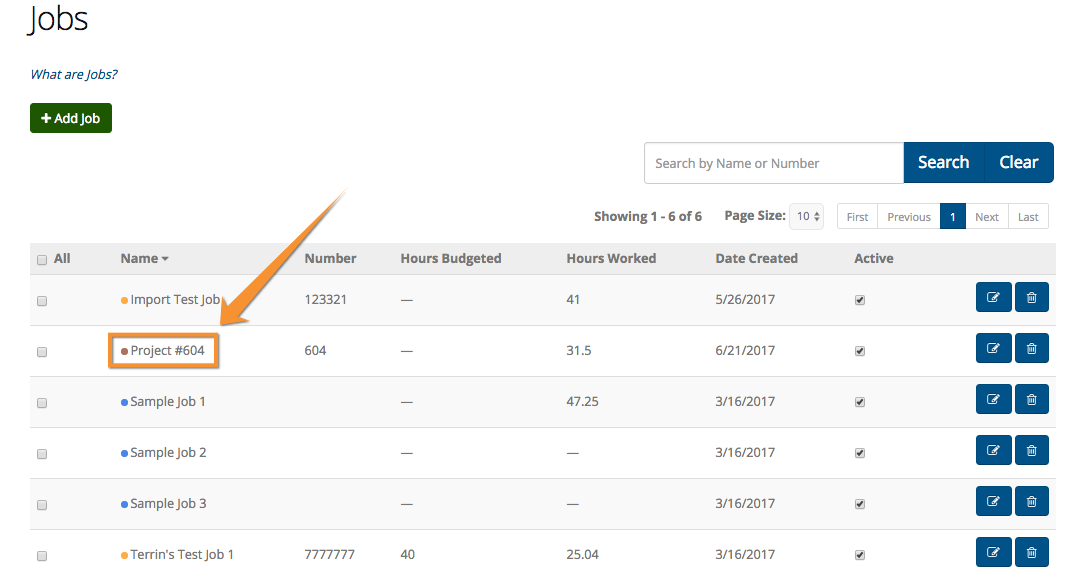
Then, as time is tracked against these jobs and tasks in ClockShark, you can export the time logged against these jobs into a CSV format:
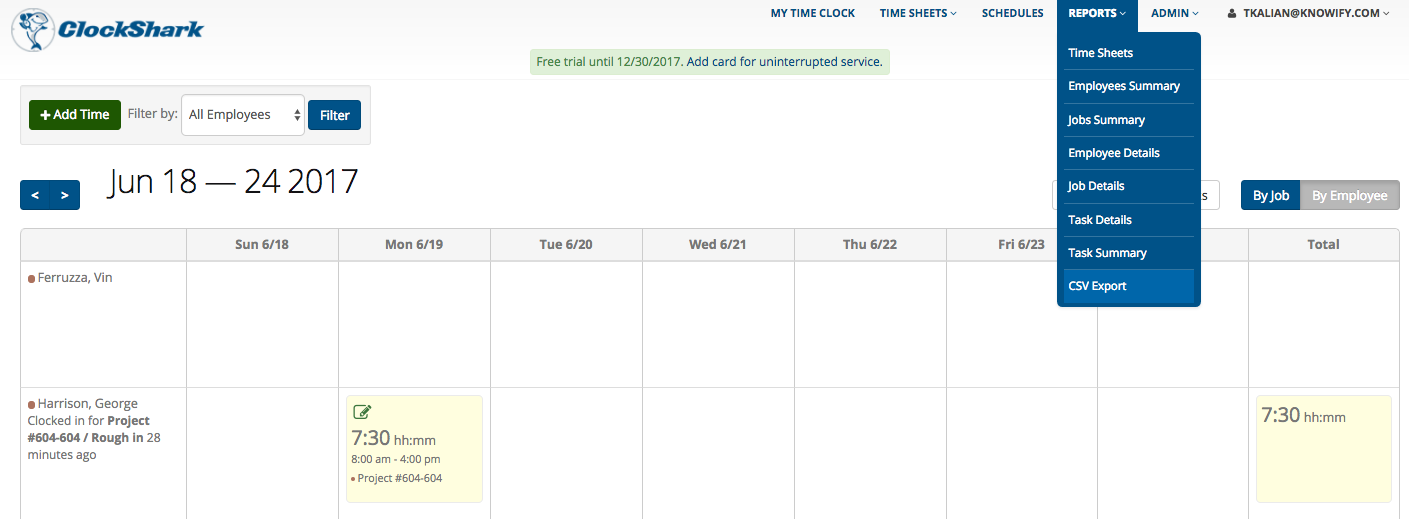
This will export a spreadsheet with columns in the following order, First Name, Last Name, Job Name, Job Number, Task, Task Code, Start, End, Break Minutes, Billable Minutes, Total Minutes, Notes. See below:

To get this time into Knowify, go to the Review Time section, where you’ll see an Import button:

Press, Import, then copy the values from the CSV export from ClockShark (not the column headers), and paste them in the box that pops up:
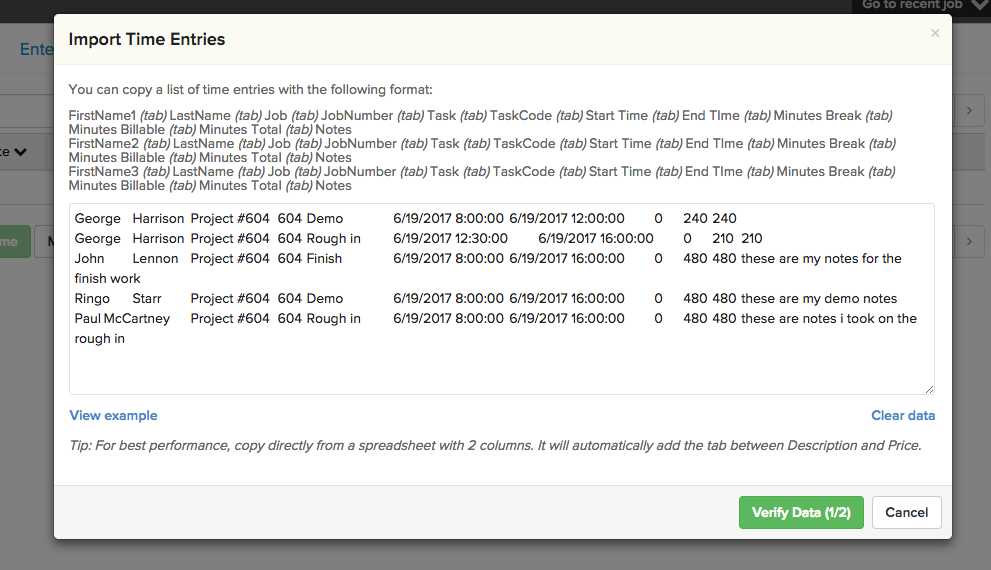
When the time is verified and submitted, it will be imported into Knowify, with each employees time entered against the corresponding job and task they checked in on in ClockShark, and the cost will be associated against the budget!
