The Enter Time tab is found within the Time Tracker Module
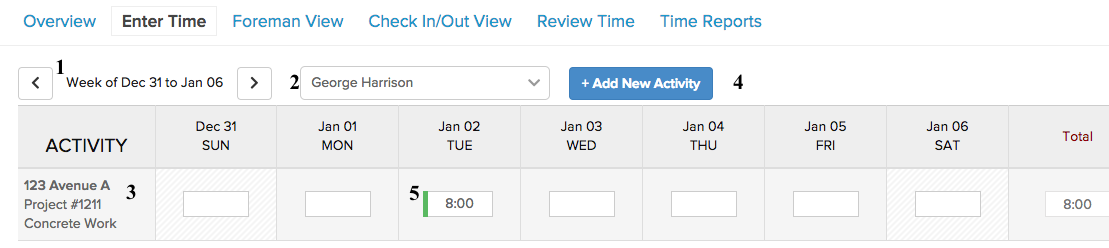
- This indicates the week of the timesheet you are viewing. The week can be changed by clicking either of the arrows in the corresponding direction.
- Select the employee for which you would like to view their timesheet. In the example above, we have selected George Harrison’s time sheet. We can expect to view all of the jobs he is scheduled to on this sheet.
- The activity indicates exactly where the employee’s hours are being assigned to. The activity is organized to show, in this order:
- The Client’s Name
- The Job Name
- Particular phase of the Job
- If the job or phase is not listed in this employee’s timesheet, click Add New Activity. From there, you can select the phase name of the job you would like the employee to enter time to.
- Click the specific box under the date you would like to add time to. Click on the box to save the time entry. Once you are ready to submit time entries for approval, click Save and Submit in the bottom-right corner. The box will receive a green stripe, as shown above, to certify the entry has been submitted.

Time won’t become billable until the time is reviewed and approved (for time & material work). To learn more, see our Review Time tutorial.