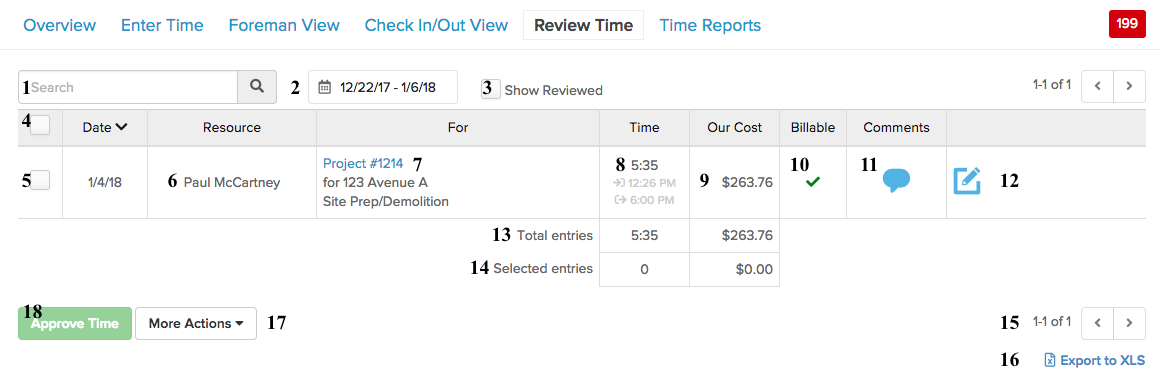
- Search for a time entry among those that have been submitted for review. You can search by resource, job name, client name, or phase name.
- View time entries within a specific date range. Click the calendar to change the date range.
- Show previously reviewed time entries within the selected date range.
- Select all time entries on this page. This is used to perform an action (like approving) that affects all time entries at once rather than one at a time.
- Select a specific time entry to perform an action.
- Resource name – the name of the user that has submitted a time entry for approval.
- The job name and phase name in which time has been allocated to.
- The total time submitted for approval by a user.
- The calculated labor cost to your company. This is calculated based on the amount of time being submitted and the rate at which you pay this particular employee. Not to be confused with how much you are charging a client.
- For Cost Plus jobs, this column shows whether this entry of labor hours is billable to the client. For all other types of jobs, this column can be ignored.
- The comment section for this time entry. If the bubble is gray, no comments have been added yet. If it is blue, like shown above, comments have been entered. It could be a note from the user, though for check in/out time entries, we automatically enter the time and location details as comments.
- The the pencil and paper icon ( ) is used to edit time entries. Once in edit mode, you can manually change the amount of time, labor cost, job receiving the time entry, and toggle whether it should be billable.
- The total amount of time and cost of all entries on this page.
- The total amount time and cost of all selected entries on this page.
- If you have many time entries, you can sort through them by clicking the arrows to change the page.
- You can export time entries to a spreadsheet right on your desktop. It will download as a .xls file, which is best opened up in Microsoft Excel, or similar software.
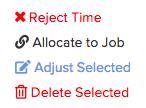
- You can perform other actions than just approving time. After an entry or entries are selected, click More Actions to reveal the following choices:
- Click this button to approve the selected time entry or entries. Once approved, they will be sent over to your connected QuickBooks Online account. If you’re not connected to QuickBooks Online, time entries will still need to be approved to add to your job’s reflected labor cost.