
In the construction industry, one of the biggest challenges is ensuring everything and everyone is in the right place at the right time.
For this reason, effective scheduling can make or break a project. A recent survey of 221 contractors found that nearly half of them claimed that scheduling delays have a daily impact on their bottom line.
Tomorrow is always the busiest day of the week. But it doesn’t have to be. With the right understanding of the ins and outs of construction scheduling, you can improve your scheduling process to dramatically improve your time management and productivity. Keep reading to gain the know-how needed to get more done in less time.
What is a construction project schedule?
Everyone interacts with schedules in their daily life to remind them what to do and where to be. But in the specialty trades, a schedule is so much more than just a list of reminders.
A construction schedule determines the timing and sequence of tasks and phases throughout a construction project. They provide a completion time for both individual tasks and the project as a whole.
Think of it as a detailed blueprint that directs the construction process from start to finish. It’s an invaluable project management tool that ensures all elements and resources are coordinated and integrated to complete the scope of work on time and under budget.
In practice, you’ll use and create a construction schedule to allocate crews and track milestones, deliverables, labor hours, and major dependencies to ensure you complete projects on time and to the specifications of the contract.
Who is responsible for creating a construction schedule?
When it’s time to make a schedule, who’s responsible? Is it the engineer, project owner, architect, or individual contractors? The answer is all of the above.
Making a schedule requires input from everyone on the project team, including contractors and the project owner. However, the scheduler should have extensive knowledge of the project’s concepts and technical elements.
In addition, it’s recommended that the scheduler use construction management software and is well-versed in how to use it.
Scheduling software can automate a lot of the more tedious aspects of schedule creation and goes a long way in reducing human error.
It also allows for quick adjustments and modifications to the schedule that is easily shared with relevant stakeholders–and as we’ll see, investing toward refining your scheduling can reduce labor costs and improve overall crew efficiency.
Why schedule projects?
“You may delay, but time will not.” – Ben Franklin
Before we dive in, it’s worth noting that you shouldn’t confuse scheduling with general project planning. If your planning process begins and ends with scheduling, you’re missing the point.
Scheduling is just one component of the pre-construction planning process. Essentially, a plan is what you’re doing, while a schedule is when you’re doing it. It takes both a plan and a schedule to get work done on time.
This starts with a crystal clear understanding of the scope of work. Planning and scheduling should always be directly pulled from the scope of work. A lack of clarity around the scope can lead to disastrous budget overruns, costly delays, and client dissatisfaction.
Most construction projects will come with several different stakeholders. Each will heavily rely on the construction schedule, albeit from different perspectives. Many will want up-to-the-minute updates on schedules throughout a project.
Below, we’ll look at some of the main reasons why scheduling projects is vital to the execution of projects for everyone involved.
Project control
Once a project kicks off, it can quickly divert in many different directions. Spending can get out of control; deadlines missed; the scope can change; disputes can halt progress; and unforeseen job site issues can ruin even the best of plans.
For this reason, it’s crucial to know where you stand compared to where you planned to be. Tracking against expectations is paramount for regaining control of projects. If you can identify where and why a project is off track, you can make corrective adjustments to quickly get projects back to where they need to be. This holds true for budgeting, job costing, and scheduling.
For contractors, the benefits that schedules have on project control are clear, but for project owners, they value schedules for the following reasons:
- Identify expected completion dates
- Ensure contractors are planning around completion dates
- Cash flow forecasting
- Project monitoring
- Evaluate change orders
- Verify delay claims
- Smooth project completion
Completion dates
For most contracts, you must finish a project by a certain date dictated in the contract. Your goal is to ensure the schedule meets the contract completion date. Know this completion date by heart and ensure you’re considering certain aspects like substantial completion.
Some contracts will hit you with hefty fees if you don’t complete your portion of the project by the given completion date. Moreover, you may burn a few too many bridges in the process.
Activity planning
Specific job tasks might require specialized materials, techniques, or attention. For example, you might need to order a specially designed or expensive piece of equipment that must be there before installation.
Some materials may come with long lead times, requiring you to place an order several months in advance. Your schedule will need to account for this, and you’ll need to ensure any logistics for material pickup and distribution coincide with the rest of the project tasks. Failure to line resources with tasks can delay the entire project indefinitely.
In addition, delivery of large items may need additional requirements like permits or coordination with the local authorities to avoid disruptions in residential areas. The schedule will help detail these important dates and ensure all stakeholders know these timelines.
Coordination
As a contractor you’re pulled in a hundred different directions on any given project. From allocating resources to scheduling crews, to transportation, to job site conditions, you’ll have to juggle many things at once.
Not to mention the need to coordinate with your GC and the other specialty trades you’ll be working alongside. All combined, you’ll need to ensure you’re using an accurate schedule to avoid conflicts with other contractors.
For example, if you’re a painting contractor, you won’t be able to start work until the drywall contractor finishes their portion of the work, and they won’t be able to start until the framing is complete.
All this depends on the integrity of the schedules created by each respective trade. Ensure you’re not holding up the operation through your inability to effectively schedule.
Cash flow management
Cash flow statements will detail the amount of cash entering and leaving your business over a specific period of time. For this reason, the timing of construction activities will impact your cash flow.
Some phases of a job will be more expensive than others. This can affect your schedule since you may want to delay the start of certain tasks to ensure you’ll have enough capital available to continue work.
You can also use a schedule to track it against your construction budget to see where you may run into cash crunches. One strategy to use here is to match up your budget with the job schedule so you can see how much cash you’ll need each week to execute the job.
This will inevitably show gaps where you’ll be short on cash. Knowing this will give you the information and time needed to mitigate those cash shortages and put your team in a better position to succeed.
Change order management
Changes in scope are likely to occur on most projects. Change orders will result in a deletion, addition, substitution, or change to the scope of work. Any of the above will impact the budget and schedule of the project. If you’re starting with an imperfect budget, it will be impossible to effectively measure any change order’s impact on a project.
If, however, you’re starting with an accurate construction schedule, you’ll be in a much better position to see how the change order will impact any upcoming timelines or milestones.
This is crucial to know, as any schedule change will affect material deliveries, cash flow, and overall budgets. It’s your responsibility as a contractor to understand if a change order will have such an impact. If it will, you must communicate this to your GC, project owner, or relevant stakeholders for further evaluation.
Types of construction schedules
There are many different approaches to scheduling. Each type of schedule has unique advantages that help contractors account for various constraints such as budgets, time, labor, and materials.
The ten most commonly used methods are as follows:
- Critical Path Method (CPM)
- Gantt Charts
- Program Evaluation and Review Technique (PERT)
- Line of Balance (LOB)
- Quantitative Scheduling
- Resource Scheduling
- Last Planner System
- Lookahead Planning
- Master Schedule
- Milestone Chart
While different trades and project types prefer different methods, this article will focus on the top two methods: The critical path method and Gantt charts.
Critical path method
Imagine you and three friends are going to cook a Thanksgiving dinner. One friend will prepare the Turkey, the other will prepare the vegetables, and you’ll set the table and prepare the dining area. In this example, there are four tasks:
- Prepare turkey
- Prepare vegetable
- Set table
- Eat
The 4th activity cannot start until all three preceding activities are completed. But what happens if each activity takes a different amount of time to complete? What happens if one friend finishes their activity before the others? Or one friend could wait to start their task because they know it won’t take as long as the others.
In essence, this person has extra time to kill. They can choose to do nothing or choose to help with any of the other remaining tasks. This extra time is called float. Float time must be carefully monitored. If they waste more time than they’re allotted, they might not finish their task in time, which could delay the entire schedule, affecting the other tasks.
You, however, don’t have any float time while setting the table. This means you don’t have any extra time to kill and must work on your activity without delay. This makes this task critical. This scenario is a basic example showcasing the critical path method scheduling structure.
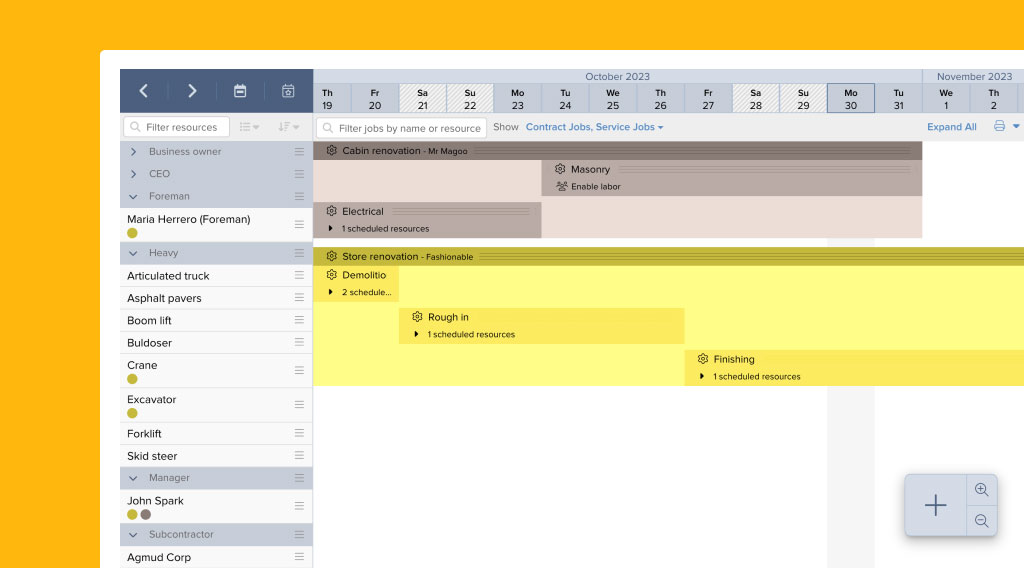
Gantt charts
A Gantt chart is a visual display of all schedule-related information. Developed by Henery L. Gantt, a renowned mechanical engineer, in 1917, the Gantt chart has remained a tried and true scheduling method within the construction industry.
It’s favored for its ability to display project activities through easy-to-read graphics. In addition, it shows both the duration and dependencies between phases of work. This makes it a great option for highly complex or multi-phase jobs.

A Gantt chart helps visualize and monitor progress, identify potential bottlenecks, and make adjustments to stay on track with project timelines.
Before making a Gantt chart, you’ll need to break the job down into smaller components. These components are known as tasks or activities. It’s important to find a balanced and necessary amount of tasks. You’ll need to ensure you can easily measure and track each task, so don’t get carried away.
An example of a task might be laying down a foundation or something as small as installing a door. This depends on how granular you want to get. Once each task has been identified, you’ll need to estimate how long each will take. You’ll do this by pinpointing each task’s start and end date.
These time estimates will often include waiting time. For example, if one of your tasks is to secure a permit, you’ll spend most of this time waiting to hear back. You’ll still account for this time in your estimate, but timelines won’t always represent continuous work.
With your Gantt chart, you can get as robust or slimmed down as you want. You can include budget numbers or details on resources and materials, or you can choose only to include start and end dates. Include what you’ll find beneficial.
The main benefit of using Gantt charts is their simplicity. Stakeholders can quickly see how long each task will take and understand which will take the longest. This makes it approachable for any project stakeholders who are unfamiliar with the ins and outs of construction scheduling.
A Gantt chart makes planning, tracking, and communicating the schedule easy so everyone understands and works towards the same goal.
Gantt charts have morphed into both a scheduling tool and a reporting tool. With the advent of construction management software, Gantt charts are a powerful reporting tool for capturing both the time needed for each project phase and the interdependencies between phases.
5 steps to make a construction schedule
In general, there are five basic steps to creating a construction schedule:
- Break down the project into tasks or work activities:
- Estimate and determine the duration of each task
- Determine logical relationships
- Create a diagram or visualization of all tasks
- Identify the critical path (longest sequence of tasks that must be completed before the project can finish)
- Assign start and end dates for each task
- Review and make adjustments
A good construction schedule needs to be comprehensive and realistic. It should identify progress milestones, clearly define tasks and their duration, assign resources, show task interdependencies, and help get ahead of problems to ensure the project is on time and on budget.
1. Break down the project into tasks
Whether a small maintenance job or a large multi-year project, creating a schedule begins with dividing the project into smaller components called tasks or activities. A task or activity is any unique, definable portion of work. This step isn’t a science. There is no right or wrong way to break your project down into smaller tasks.
However, when you’re working on your work breakdown structure, keep the number of individual tasks down to a small, manageable list. Too many tasks will overload the amount of administrative work needed. Another approach is to roll up a group of smaller tasks into a “major” task.
Take the following into consideration when dividing up your workload:
- Nature of the task: If any work involves different materials, installation techniques, or measurements, it’s best to break this down into smaller activities. For example, instead of one task called “wall installation,” create a major task that has smaller activities under it:
Wall installation:
- Framing
- Electrical wiring
- Drywall
- Painting
- Location: If any tasks will take place in different locations, it’s best to segment those out as separate elements of work.
- Timing: It’s crucial to consider the chronology of all tasks. If you know a portion of the work will take a considerable amount of time, break this element out into its own task.
- Responsibility: Determine who is responsible for the completion of each element of a project. If different crews are needed for certain tasks, this will help you segment the work and schedule the appropriate crews for each activity. This is also an effective way to break out any tasks requiring additional subcontractors.
- Contract details: Read the contract carefully. Some, especially government contracts, will provide restrictions and/or limitations to the duration of certain tasks. For example, this could mean you’re contractually obligated to complete a certain task within 30 days. It’s vital to understand such limitations so you can factor them into your schedule.
- The difficulty of the task: You might feel less than confident that you can complete a certain task on time. In this case, break it down into smaller tasks so you can chip away at it. This will help make the task more manageable and ensure that progress is made throughout.
When in doubt, never combine two tasks that you’ll measure differently, performed in different locations/time periods or by different crews.
2. Estimate and determine the duration of each task
This step can be tricky to get right. Many factors will affect the duration of each task, from crew size to materials used. However, you can use the following formula to help your estimations:
Duration = Total quantity / Productivity
If you need to construct 1,000 yards of fence with a crew that can average 70 yards of fence per day, the formula would reflect the following:
Duration = 1,000 yards / 70 yards per day = 14 days
Use this formula as a starting point, but don’t forget to look back at past jobs to see how long certain tasks have taken to complete in the past. Then, make adjustments based on the circumstances of the current job. Factor in weather conditions, job complexity, or crew experience levels.
Take a conservative approach when estimating durations. Even if you’re highly confident in your estimate, it’s still a prediction subject to fate. No prediction is perfect, but your ultimate goal is to set your own bullseye and hit it.
3. Determine task relationships
This step identifies which activities can’t start until the preceding activity is completed. Looking back at our previous example, no one can eat the Thanksgiving dinner until the turkey is cooked and the table is set.
Identify these tasks in your own project. For example, drywall cannot start until the framing is finished.
4. Create a visualization to represent the schedule
In this step, you’ll determine a logic network. This means you’ll bring everything together and calculate a start and end date for each task and the project as a whole.
This also includes determining the critical path and available float for all tasks.
5. Review your schedule and make adjustments as needed
When it’s all put together, take the time to review your schedule with a critical eye. Ensure the logic flow of your project makes sense–(i.e., all tasks are in the correct order assigned to the correct crews, and chronology is reasonable and achievable).
What makes a good construction schedule?
A good construction schedule must be accurate and reliable to ensure that all tasks are completed on time and in the correct order. Additionally, the schedule should be easy to understand and kept up to date to ensure that all stakeholders are aware of any changes that may affect the project’s timeline.
Furthermore, it should be flexible enough to accommodate any changes that may occur throughout the project. To achieve this, you’ll need to ensure open lines of communication and the successful implementation of the schedule itself.
Input from all team members
Any initial input you can gain from your crew, or additional subs/trades can be of immense help to improving your schedule.
General contractors and project owners usually discuss schedules in pre-construction meetings. Project stakeholders will use whatever information you provide to help them create their schedules.
Be sure to bring up any constraints or concerns in this meeting. In addition, clarify expectations and responsibilities in this meeting. Subsequently, have this meeting with your own crew.
Communicate the overall plan and timeline with your crew. Collect and review feedback and factor their input into any adjustments you make.
Determined implementation
Implementing the schedule means actually executing it–(i.e., taking the written plan and physically performing it). To improve your schedule’s effectiveness, start by ensuring that it’s realistic, accurate, and has the sign-off from all relevant stakeholders.
Next, be sure that your crew takes the schedule seriously, especially concerning your foreman or project managers. They must hold the schedule sacred and base all of their decisions on the game plan set forth by it.
As the project progresses, be sure that there is a constant and clear line of communication. If any change orders come through or there are imminent weather delays that cause you to adjust the schedule, your team and project owners must be aware of these changes. All relevant stakeholders must be aware of any changes that’ll affect the schedule in any way.
Common mistakes to avoid in scheduling construction projects
Common mistakes to avoid when scheduling a construction project include:
- Underestimating the time it takes to complete tasks.
- Relying on inaccurate estimates.
- Assuming tasks are independent when they’re not.
- Neglecting to include unexpected delays or contingencies.
- Not factoring in weather or external factors that may affect the timeline.
Overlooking external factors: Don’t forget to account for weather in the form of rain delays or labor regulations such as mandated breaks.
Not setting realistic deadlines: Project timelines must be achievable given the contract requirements, capabilities, and resources available to your crew. If you’re too aggressive with your end dates, you’ll likely miss a few deadlines that can affect all the following tasks. Be conservative and realistic with your timelines.
Don’t overpromise, and don’t assume anything regarding schedule responsibilities. In your pre-construction meeting, hash out any disputes regarding completion dates, and be ready to back up any of your claims or issues with schedule expectations.
Poor communication: As mentioned earlier, it’s paramount that all stakeholders are kept in the know when it comes to scheduling changes or issues. Everyone from the project owner to the last man on your crew must be on the same page regarding the schedule.
Imprecise start and end dates: Some tasks will have a range of dates on which the work can be completed. For example, laying a foundation can start as early as June 1st or as late as August 1st. Your field crew can choose when to start within that date range in this scenario. However, it’s recommended that you don’t provide a choice of date selection to your field crew or subcontractors. Give a precise start and end date that they can adhere to.
Not accounting for resources: The project manager must ensure enough resources are available for each task to ensure the project is completed on time.
Not monitoring progress: This starts by comparing your baseline schedule to actual results–what was planned vs. what was actually done. When doing this, look for any deviation from the plan. When identified, you can take corrective action whenever and wherever needed to steer the project back on track.
By avoiding these common mistakes, you can ensure that the project progresses according to plan. Remember that your schedule may change throughout the project. Keep everyone informed, adjust crew tasks accordingly, and adjust your schedule to meet all deadlines.
Conclusion
Creating a construction schedule is a vital step in the overall construction process. Not only does it help you plan and schedule tasks and crews, but also allows you to track progress and identify any potential delays or issues.
With the right understanding and implementation of effective scheduling practices, you can greatly improve your time management and increase efficiency on the job site. Remember, a good schedule involves input from all team members, accurate estimations, and realistic deadlines.
Revolutionize your business with Knowify
To see how Knowify’s all-in-one solution surpasses any stand-alone scheduling tool, book a free 30-minute demo today!