When you start a new Knowify account, it will automatically be in Test Mode. For companies connecting Knowify to a QuickBooks account, Test Mode allows users to explore Knowify without sending any test data to QuickBooks. We encourage users to create projects and test all that Knowify has to offer. Switching to Live Mode will prompt a user to clear their account data and re-sync, so everything can push cleanly into QuickBooks.
Test Mode #
When you first sync your QuickBooks and Knowify accounts, Knowify will pull in information from QuickBooks such as your clients, vendors, and materials list, which will help make your testing of Knowify as realistic as possible. However, instead of mixing all of your test data with your actual company data, Test Mode prevents sending any information back over to QuickBooks. This way, you can get the greatest sense of how Knowify will work for your company, without effecting your accounting data.  If you’d like to see the data created in Knowify that wasn’t pushed to QuickBooks while in test mode, you can go to your QuickBooks Module in Knowify and it will display anything created in Test Mode that wasn’t synced, as shown below:
Live Mode #
Live Mode (which can be accessed by clicking the Test/Live switch, highlighted above) is used when you are ready to proceed with Knowify full-time. Switching to Live will remove the syncing block, and allow information to pass freely between Knowify and QuickBooks.
When the Test/Live switch is clicked, you will see the following popup message:  When making the switch, you will be given the option of keeping all of the Test Data you made, or starting from scratch. Starting from scratch will remove all job data. If you choose to keep your test data, it will stay just in Knowify unless you manually send it over to QuickBooks.
  Once in Live Mode, when an item is created in Knowify or QuickBooks from this point forward, a green Complete button will appear in the QuickBooks module, to show you its sync status.
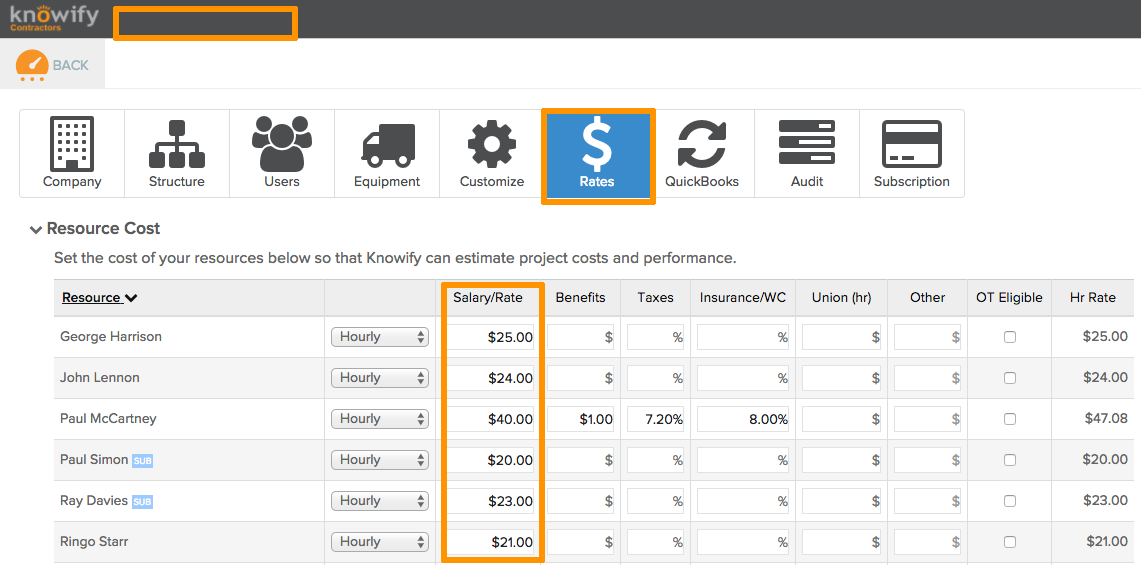
If you decide to start from scratch, you will still retain the information set up in your Admin section that is related to your account, rather than jobs. This includes all User information and settings, as well as the Rates you have setup for everyone. See below: Test Mode: Live Mode:
If you decide to keep your data then anything created in Knowify will need to be manually pushed to QB. To do this, you can go through your QuickBooks module to see the items not synced with QuickBooks:  Clicking the client name will search for all clients with that name. We are left with one result. The pencil and paper icon is our edit button. Click here to edit the client’s QuickBooks status:
  Clicking the edit button will open the window featured below. Scrolling down to the bottom, you will see a blue No Sync button. This means that this specific item hasn’t been sent to QuickBooks. To resolve this, click the small triangle next the No Sync button to open the dropdown menu. From here, click that Send to QuickBooks now button.
  This process is done similarly with other items wishing to be synced over to QuickBooks. Simply go through the QuickBooks module to see what needs to be synced, open the item, and look for the No Sync button to manually send it over. ***Disclaimer: Keeping your data can cause discrepancies between QuickBooks and Knowify. (ex. if you create a client in Knowify in Test Mode, and also create it in QuickBooks, they cannot sync in Live mode because it would create a duplicate) This is why we always recommend starting from scratch when it is an option. If you have questions about this, please contact us at support@knowify.com for assistance***