Adding a tax rate depends on whether your Knowify account is connected with QuickBooks Online or not. This guide will show an unconnected account first. If you are currently connected to QuickBooks Online, skip down to Part 2.
1. Not Connected to QuickBooks Online
First, head over to the admin section by clicking on this icon located at the top right:

Next, select Customize. In the Customize section, notice the Sales Tax tab:
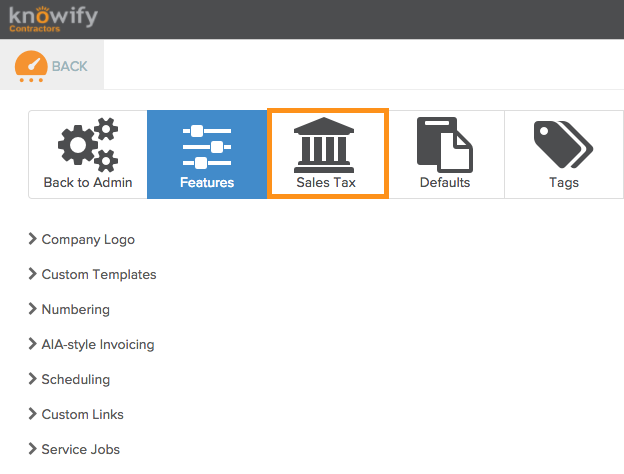
In the Sales Tax tab, click “add a rate” to enter a new tax rate. Enter the description and percentage, then click the checkmark to save. Upon completion, you will be able to use this tax rate from then on.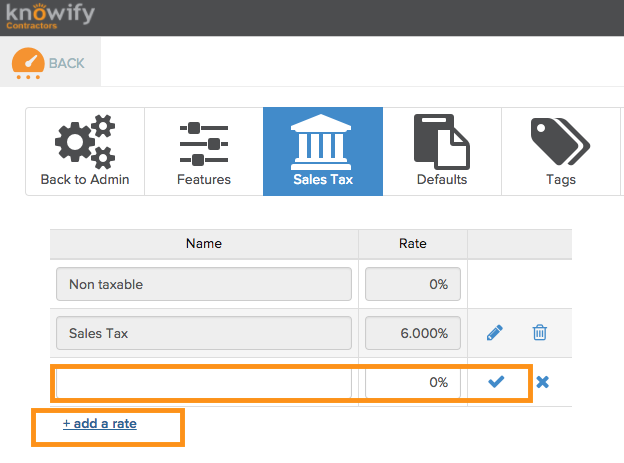
2. Connected to QuickBooks Online
If you are currently connected to QuickBooks Online, you won’t be able to add a tax rate in Knowify, evidenced below. Instead, we’ll pull in tax rates from your QuickBooks account.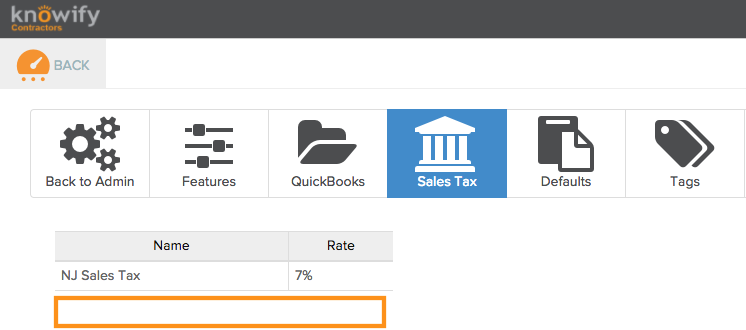
On your QuickBooks Online homepage, find the Taxes section, and click Sales Tax, shown below:
In the Sales Tax section, you will see the below image to the right side of the screen. Click Add/edit Tax rates and agencies: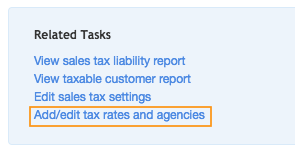
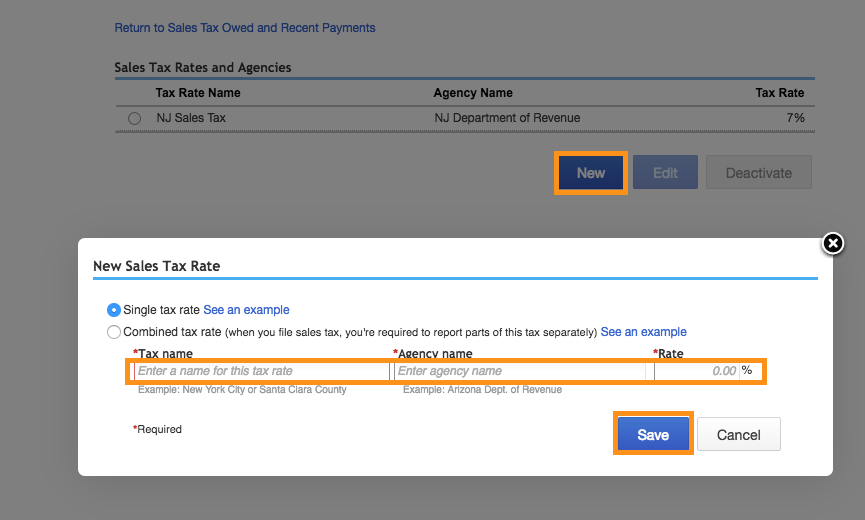
Now, click New to open up the New Sales Tax Rate popup. Enter the information and click Save upon completion. Once saved, the new tax rate will be sent over to your Knowify account automatically (if you’re logged into Knowify at the time, click the “Sync Now” button on the bottom right corner):