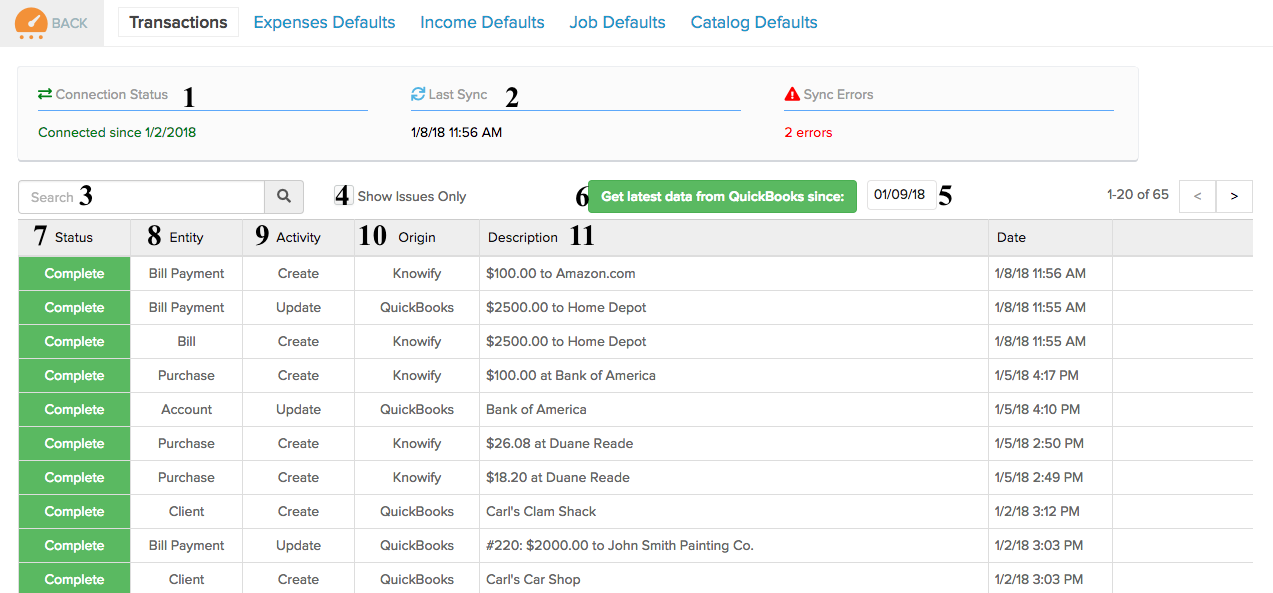
This indicates whether you are connected with QuickBooks Online.
The time of the last synced entity will show here. This is especially helpful when troubleshooting.
Search for a particular transaction that was sent to or received by QuickBooks.
Filter out the successful transactions and view those with errors.
To pull in information from QuickBooks that wasn’t done automatically, change the date back to however far you would like to re-pull information into Knowify.
Once the date is set, click the green button go pull in the latest QuickBooks Online data since the selected date.
This column reveals whether a transaction is pending, or was completed or rejected.
This column shows the type of information that was communicated between QuickBooks Online and Knowify.
This column shows what kind of action was performed.
This column indicates where the entity was originated, either in Knowify or QuickBooks Online.
A small description of the transaction.
If a transaction contained an error, there will be a “(help)” button to assist in correcting this issue. It will provide the following popup menu, which offers a recommendation in how to solve the error:
Click the wrench to re-send the transaction to QuickBooks once the error is fixed.